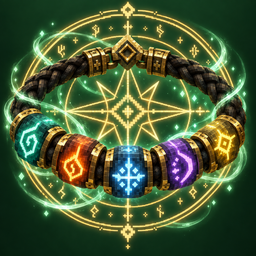
Aura: the swordsman’s path
The Cord is the mage’s path. Aura is the swordsman’s: mana drawn into your body and out along your blade. Learn a breathing method, gather aura from real blows and a steady breath, and climb five stages, from a haze on your weapon to a presence that claims the ground you stand on. Anyone can walk it, with or without a Cord, and it mixes freely with spells.
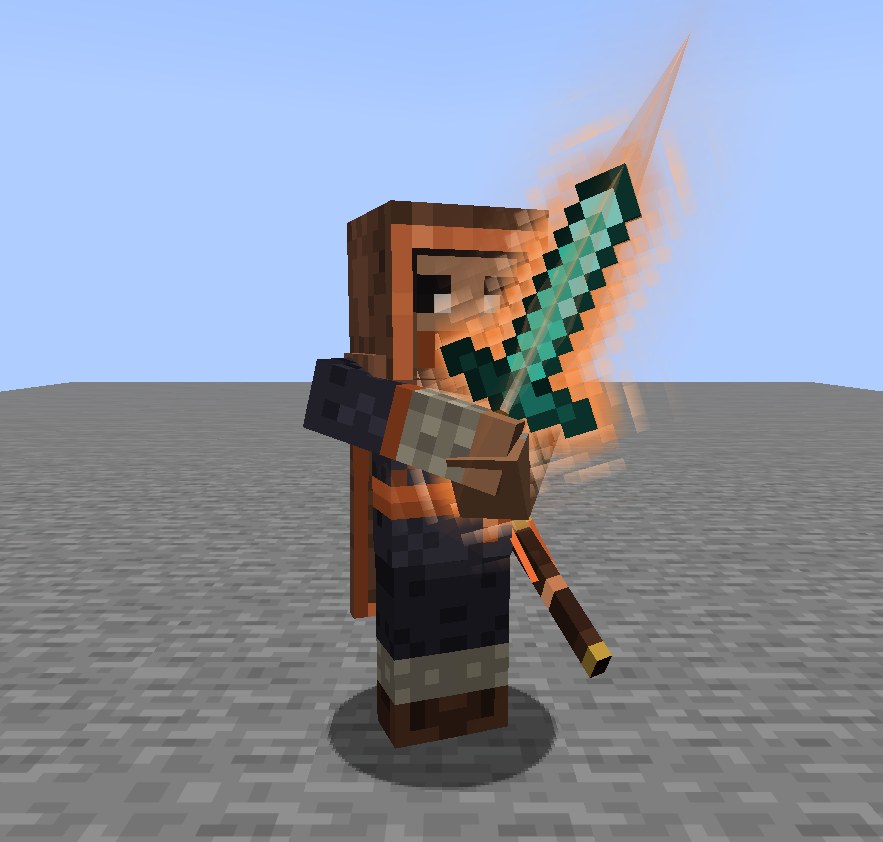
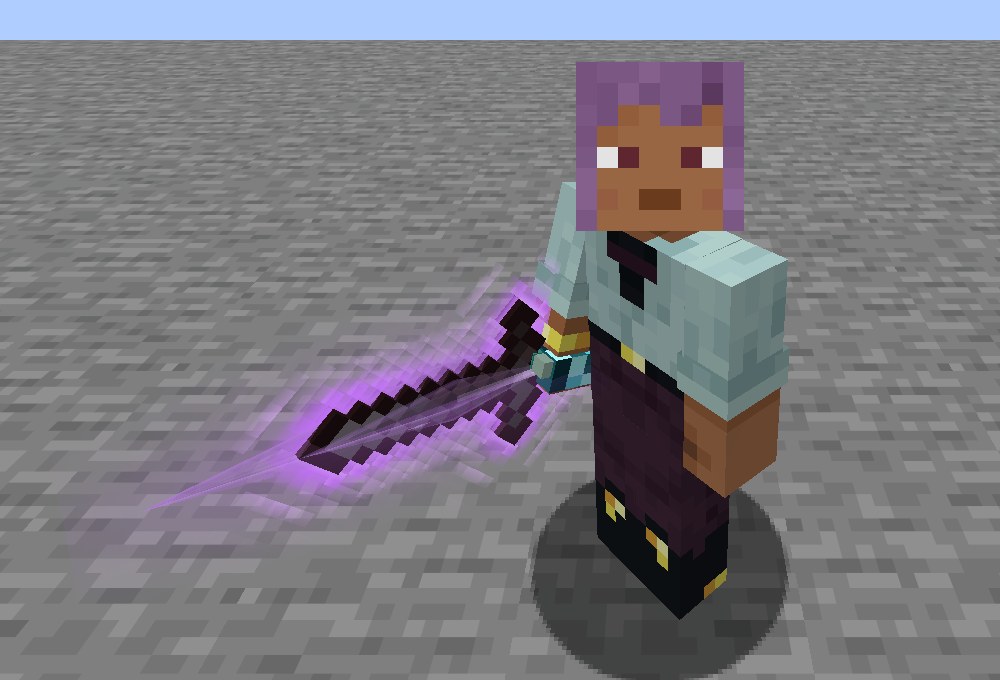 Hollow Breath at Edge: a crystal blade of aura along the sword.
- At a glance
- Breathing methods
- Gathering aura
- The stages
- Sword strings
- The Master’s Arts
- Momentum and openings
- Awakening
- The spellblade
- Blade and spell together
- Breakthroughs
- The Aura page
- Duels with a duelist
- Aura-forged gear
- Aura and other players
- Looks, sound and settings
- Where to train next
At a glance
| Start | Read a Breathing Manual. Your first method brings the first stage, Glow |
| Aura weapons | Swords, axes, spears, the trident and the mace |
| Gather aura | Land full swings on real foes, or hold the breathing stance (sneak and stand still, blade in hand) |
The Aura key (Z) |
Sneak + press: guard (Flow). Tap: slash (Edge). Double-tap: step (Form). Hold: Dominion (Sovereign). Tap then hold: awaken (Edge) |
| Master’s Arts | U Spellcut (Edge), Y Rising Break (Form), J Driving Cut (Form) |
| Sword strings | Short runs of ordinary swings that set off your method’s arts. See Sword Arts |
| Grow | Fight. At each stage’s limit a breakthrough waits for a trial |
| See it | The aura bar over your spell panel, and the Aura page (the Aura badge in the Cord screen, K) |
Related pages: Ways (chosen at Edge), Techniques of your own, The bonded blade, Sword Masters and their Master Forms.
Breathing methods
What it is
A method gives your aura its colour, its element and a small gift that grows with every stage. Your coated blows, slash and arts carry that element: they meet a creature’s weakness or resistance, and set off reactions (a frozen foe shatters under an Ember blade). There are 16 methods; add-ons can bring more. Every method’s arts, finisher and look are listed on Breathing Methods.
| Method | Element | Gift |
|---|---|---|
| Ember | Fire | Coated blows may set foes alight (always from Edge) |
| Rime | Frost | Coated blows slow foes |
| Thunder | Storm | Coated blows may spark to the nearest other foe |
| Gale | Wind | A little more speed in a fight |
| Stone | Earth | Blows push you back less |
| Verdant | Life | Coated blows mend you a little |
| Hollow | Void | Foes near the one you strike are drawn toward it (never a boss) |
| Starlit | Arcane | Aura gathers faster |
| Hourglass | Time | A little more attack speed |
| Crimson | Blood | Coated blows drink a little, for a little more aura |
| Tide | Brine | Coated blows push foes back and soak them (fire out, a moment slowed) |
| Iron | Metal | Coated blows crack a foe’s armour for 3 seconds |
| Dune | Sand | Coated blows may throw grit in a foe’s eyes and blind it for a moment |
| Echo | Wind | Coated blows may ring again a moment later; from Edge the foe reels |
| Dawn | Arcane | Coated blows light foes up and burn the undead; from Flow they mend you a little |
| Venom | Life | Coated blows may leave a toxin that stacks; from Edge every blow does, and weakens |

Where to find manuals
Breathing Manuals turn up where fighting is old:
- The Archive library and vault; every expedition’s vault (its own element); trial chambers (the vaults); stronghold libraries and ancient cities.
- Master weaponsmiths and master clerics sell one for emeralds and a book.
- Wandering duelists teach theirs to anyone who beats them (see below).
- Fallen knights drop Manual Pages: four pages of one method and a book make its manual.
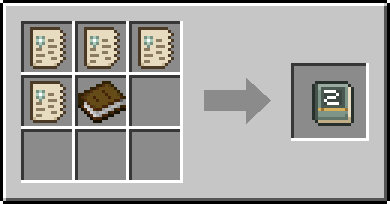
Changing method: read another manual, then read it again to confirm. You keep your stage, but lose the aura you hold and your progress toward the next breakthrough.
Gathering aura
Aura is a pool that never fades. It holds 20 at Glow, 40 at Flow, 70 at Edge, 110 at Form and 160 at Sovereign.
- Full swings fill it. Land a full-strength swing on a real foe (a monster or an enemy player). Half-charged spam gives nothing, farming one spot gives less and less, and a Training Dummy gives only a quarter.
- The breathing stance fills it. Sneak and stand still with your blade in hand. A ring closes on the aura bar with each breath: release sneak and press it again as the ring closes for a bonus burst. Moving or being hurt breaks it. With a Cord you meditate for mana at the same time.
- A waterfall bank or exposed mountain summit makes the stance recover faster, and each full breath there teaches a little (inside the practice limit, see Breakthroughs). Stand on dry ground within three blocks of a falling column of water at least six blocks tall, or on open-sky mountain ground well above sea level with the land dropping away. A message tells you when the place counts.
- Running dry brings backlash. A technique you can’t afford spends what you have, then leaves you slowed and weakened for a few seconds. It never hurts you.
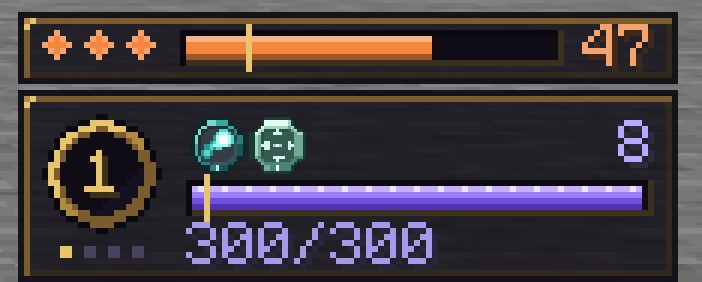 The aura bar: your stages, your aura in your method’s colour, and a gold mark at the slash’s price.
The stages
Each stage keeps everything below it. Your weapon and body show your stage for everyone to see: a haze at Glow, rippling light at Flow, a crystal blade from Edge, a mantle at Form and a burning corona at Sovereign.
Glow
- Aura Coat: while you hold aura, every blow of an aura weapon lands 10% harder in your element, for half a point of aura.
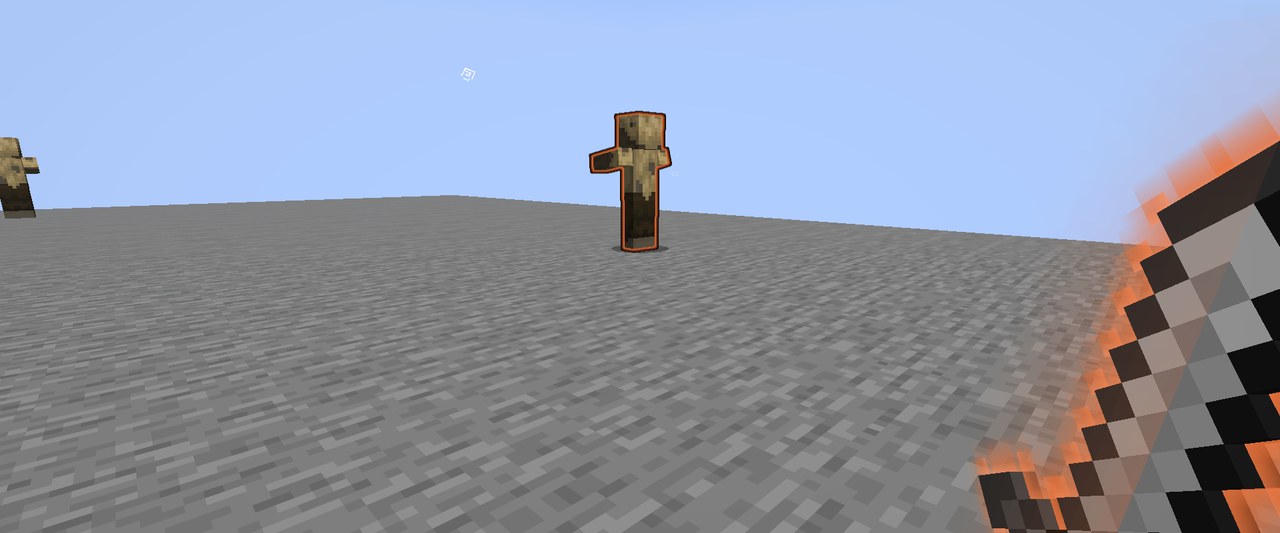
- Aura Sense: each breath in the stance outlines hostile creatures within 16 blocks, through walls, for you alone.
Flow
- Flowing Cut: every aura weapon sweeps, wider and further than a normal sword.
- Aura Guard: sneak and press the Aura key. It holds while you keep sneaking (two seconds at most) and halves blows and arrows from in front, paying aura for what it stops. Empty, it breaks with backlash.
- Perfect guard: raise it just as a blow lands. The blow is turned aside whole and the attacker staggers (a boss is only slowed), an arrow flies back, and a spell is parried, the same timing as a Shield parry.
Edge
- Crystal Edge: a block more reach, and a quarter of every coated blow goes through armour.
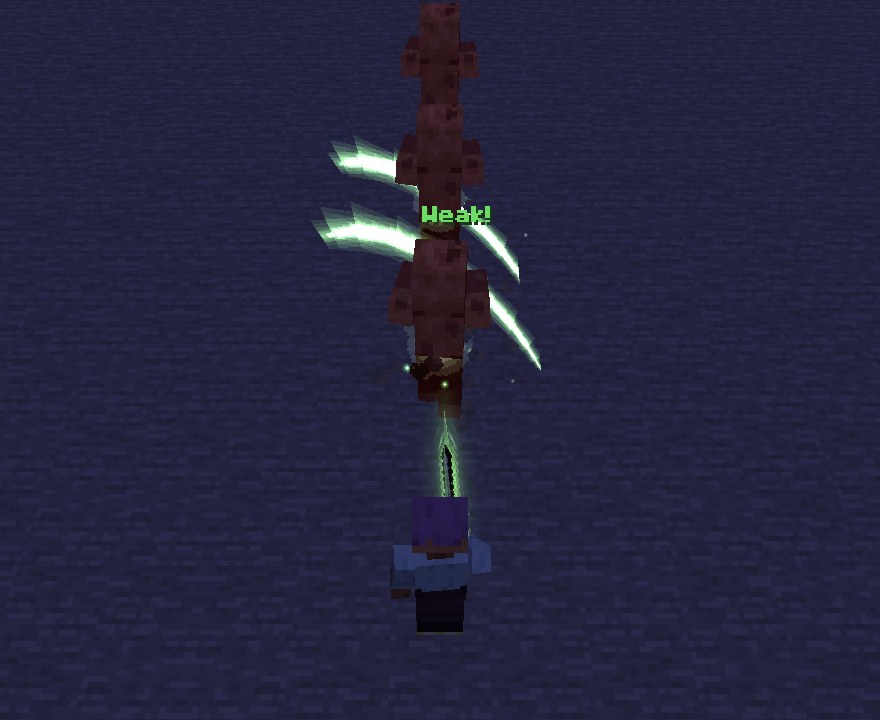
- Aura Slash: tap the Aura key to loose a crescent that cuts every foe in its path (up to 6, about 14 blocks) for a little more than your weapon’s damage. 12 aura, ready again in 2 seconds.
- Spellcut (
U), your first Master’s Art. - Awakening opens (see Awakening).
- The Edge breakthrough raises the Ways crossroads, and opens your first technique slot and the bonded blade.
Form
- Aura Step: double-tap the Aura key to dash about six blocks the way you’re moving (ahead if still). For its first moments nothing can touch you. It never passes through walls or into lava or fire. 12 aura, ready again in 2 seconds. From here a single tap waits a moment in case it’s a double-tap.
- Aura Armour: while you hold 20 aura or more, a shell takes a quarter of incoming harm (blows, arrows, spells, fire) for half a point of aura per point taken. It never spends you below 20. Falls, drowning and hunger aren’t covered. The visible shell flares during combat and Aura use, then fades at rest. Its protection stays active while you have enough Aura.
- Intent: hostile creatures within 8 blocks that are weaker than you (lower health, or a lower aura stage) are slowed and sometimes falter. Bosses never feel it.
- Aura Sense reaches 24 blocks and pulses on its own in a fight.
- Rising Break (
Y) and Driving Cut (J).
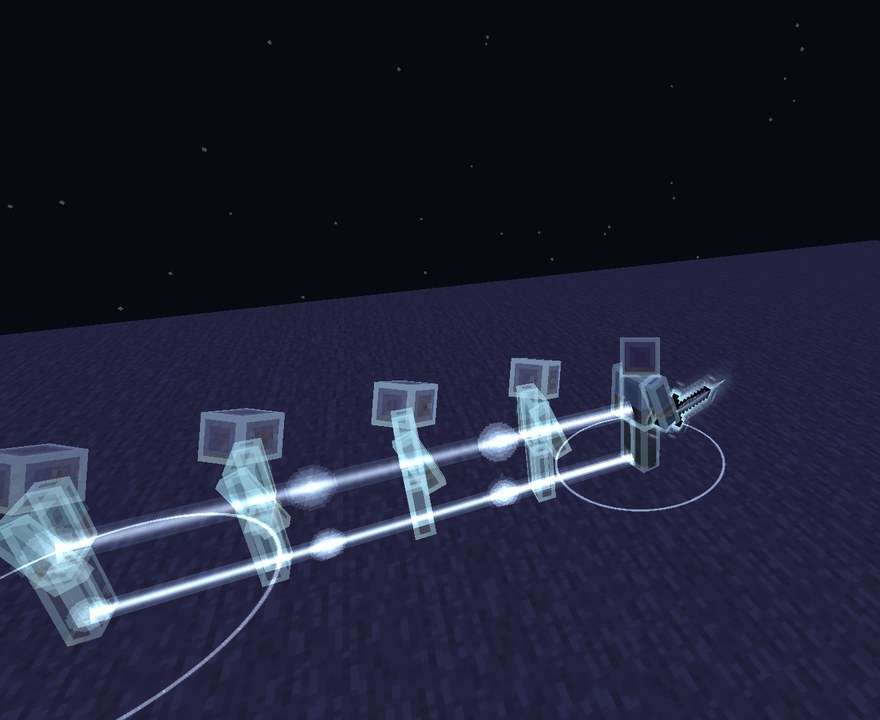 Aura Step with Rime Breath: afterimages along the way.
Sovereign
- Dominion: hold the Aura key to claim ground about six blocks across for 8 seconds. Foes inside are slowed and hit 30% weaker, each blow you land inside chains to another foe there for half its damage, and your aura flows back twice as fast. 40 aura, rests a minute and a half.
- The Final Art opens (see Sword strings).
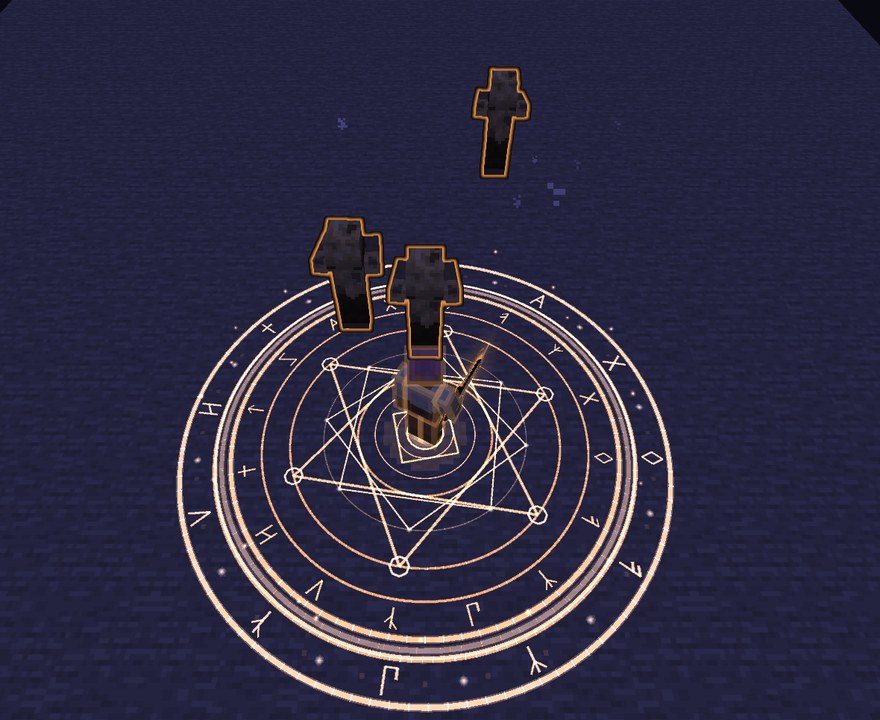 Dominion with Ember Breath.
Sword strings
Your ordinary swings are a language. Play a short string in time (a low swing, a leaping one, a counter after a perfect guard, a cut after a step) and your blade answers with an art. Every method plays the same strings, but each method’s arts do their own thing. The full list of strings, arts and their numbers is on Sword Arts.
| Art | Opens at | String | Aura | Rest |
|---|---|---|---|---|
| First | Glow | swing, swing, low swing | 6 | 3 s |
| Second | Flow | leaping swing, low swing | 8 | 4 s |
| Third | Edge | a counter | 8 | 4 s |
| Fourth | Form | a step cut | 10 | 5 s |
| Final | Sovereign | full, full, full, low, at the peak of momentum | 40 | 30 s |
Each art has a short windup: its price is paid when it starts, and if you take damage before it lands the strike is lost (the price and rest stay spent). How arts look and move is on Combat presentation.
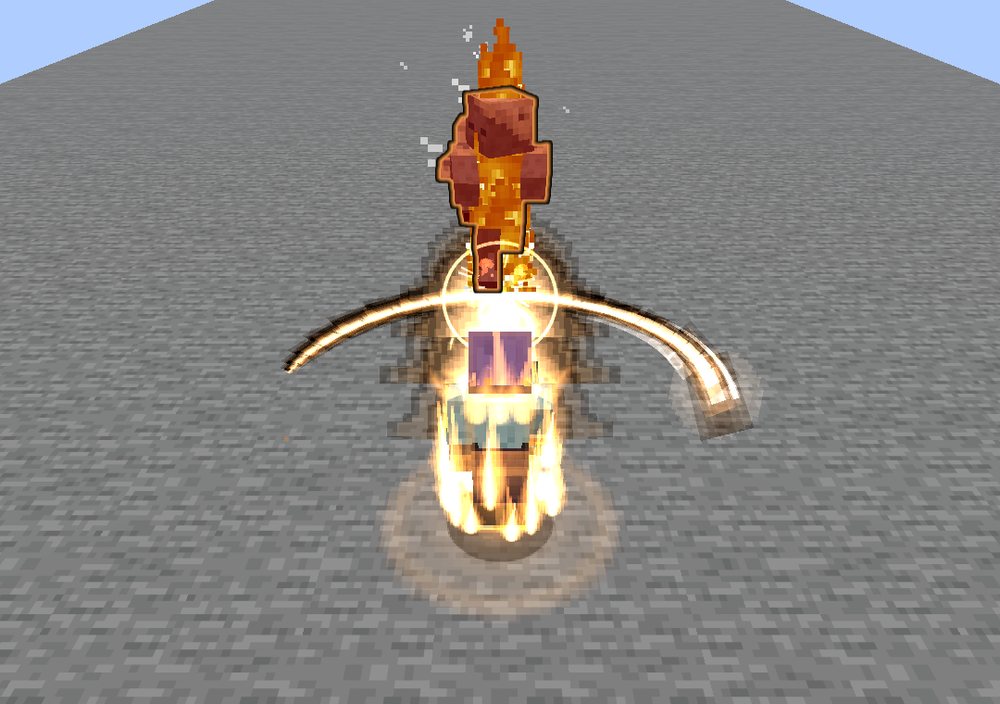 Kindling Draw, Ember Breath’s First Art.
The Master’s Arts
Three committed sword techniques on their own keys, shared by every method. Rebind them under Options > Controls > Key Binds > Wildercord: Master’s Arts.
| Art | Key | Opens at | Aura | Rest | What it does |
|---|---|---|---|---|---|
| Spellcut | U |
Edge | 14 | 3 s | Severs up to 3 hostile bolts flying at you from in front, and slashes nearby foes |
| Rising Break | Y |
Form | 20 | 5 s | Wears extra stance and lifts ordinary foes |
| Driving Cut | J |
Form | 18 | 4 s | A committed 5-block thrust. If it damages a player holding a spell (absorption counts), it breaks the spell and seals their casting for 1 second. Held spells then can’t be interrupted again for 8 seconds |
Spellcut (the U art) is not the same as Spell Cut, the timed sword swing an Ember teacher can teach you after an
Ember Master clear. See Spell Cut.
You need an aura weapon in hand. Each has a short windup and a recovery: the aura is paid at the start, and taking damage during the windup cancels the strike. You can’t stack another swing, Aura action or spell on top of it.
Momentum and openings
Momentum
Momentum is the thin line under your aura bar. Clean play fills it: full swings that land, arts that land, perfect guards, stepping through an attack, breaking a stance and landing a finisher. Hits you take knock some off, and it drains a few seconds after the fight goes quiet.
| Tier | At | Arts cost | Arts strike | Stance worn |
|---|---|---|---|---|
| 1 | 25 | 10% less | 5% harder | 10% faster |
| 2 | 50 | 15% less | 10% harder | 20% faster |
| 3 | 75 | 20% less | 15% harder | 30% faster |
| Peak | 95 | 25% less | 20% harder | 45% faster |
At the peak the line turns gold and your Final Art opens. A Final Art waits for the peak, and playing it spends 40 momentum. (If a server switches momentum off, a Final Art waits for a full aura pool instead.) Most methods build fastest on foes in the state their own arts leave them in (Ember on burning foes, Rime on frozen ones, Tide on soaked ones, and so on); Echo, Dawn and Venom have no favoured state and build the same on any foe. It can’t be farmed: foes that can’t fight back give nothing, and a training dummy gives less and stops just short of tier 3 (74). Only the practice room lets dummies carry you to the peak.
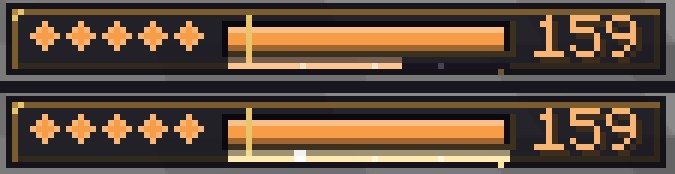
Stance and finishers
Every foe has a stance: a thin bar over its head that fills as you wear it down. Blows wear it, arts twice as fast, a perfect guard a third at once, and Stone most of all. It recovers if you back off.
When it breaks, the foe is opened for a few seconds: it staggers, and a cracked gold seal beats over its head. Your next full swing on it is your method’s finisher: the blow plus about a third of what the foe has already lost (at most four times your blade’s damage), aura back, and momentum. Then the foe stands steady for a moment.
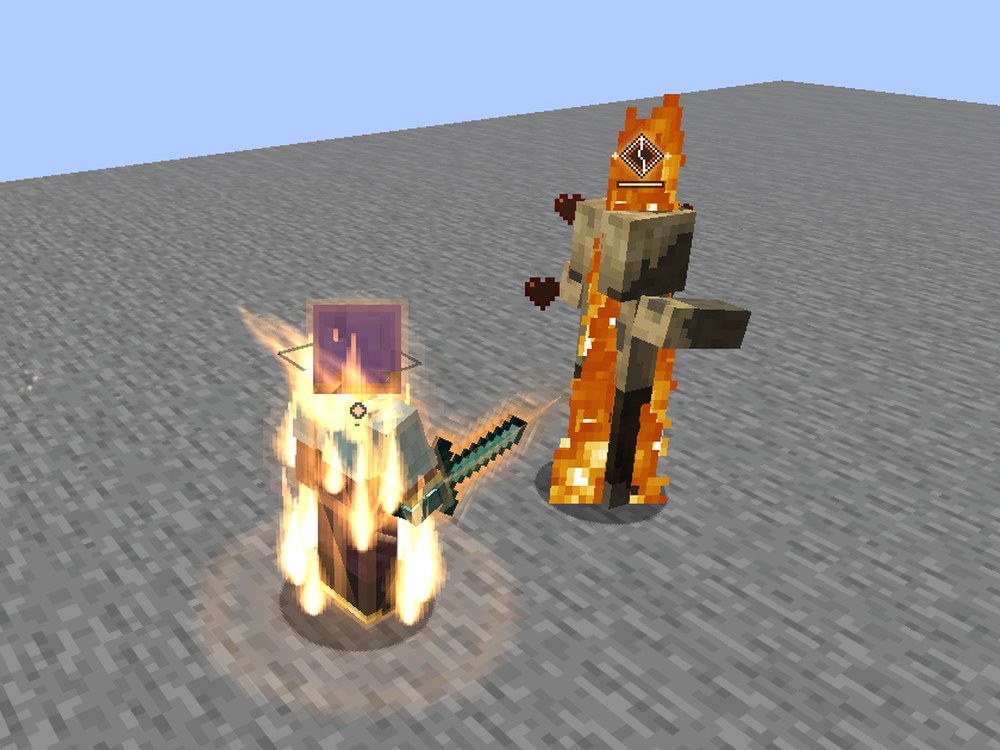
- Bosses have far more stance and recover fast. Opened, they are only slowed, take a smaller finisher, and grow steadier each time they break.
- Players have a stance too. No blow wears more than a third of it, an opened player is only slowed and loses their guard for a moment, and finishers on players are capped. Never a one-shot.
Awakening
What it is
From Edge, with a full pool and a good fight going, you can burn everything at once: 12 seconds at Edge, 16 at Form, 20 at Sovereign at your strongest, then a price.
How to use it
Tap the Aura key, then press and hold it until the ring round your crosshair closes. You need:
- your aura pool full (95% is enough),
- momentum at half or more,
- an aura weapon in hand, and the last awakening’s rest over.
A small flame after the stage diamonds glows when you can. While awakened:
- your arts cost nothing, and momentum is held at its peak (so the Final Art is open at Sovereign);
- coated blows land 15% harder, and you move and swing 10% faster;
- each finisher adds a second (four at most);
- at Sovereign, Dominion becomes your method’s own: half again as wide and as long, foes hit 40% weaker, chains to two foes.
When it ends, your aura burns away, momentum empties and you are spent for 30 seconds: slowed and gathering no aura at all. With an empty pool you have no coat, guard, slash, step, armour or arts. The next awakening waits three minutes from the end of the last. Dying ends it.
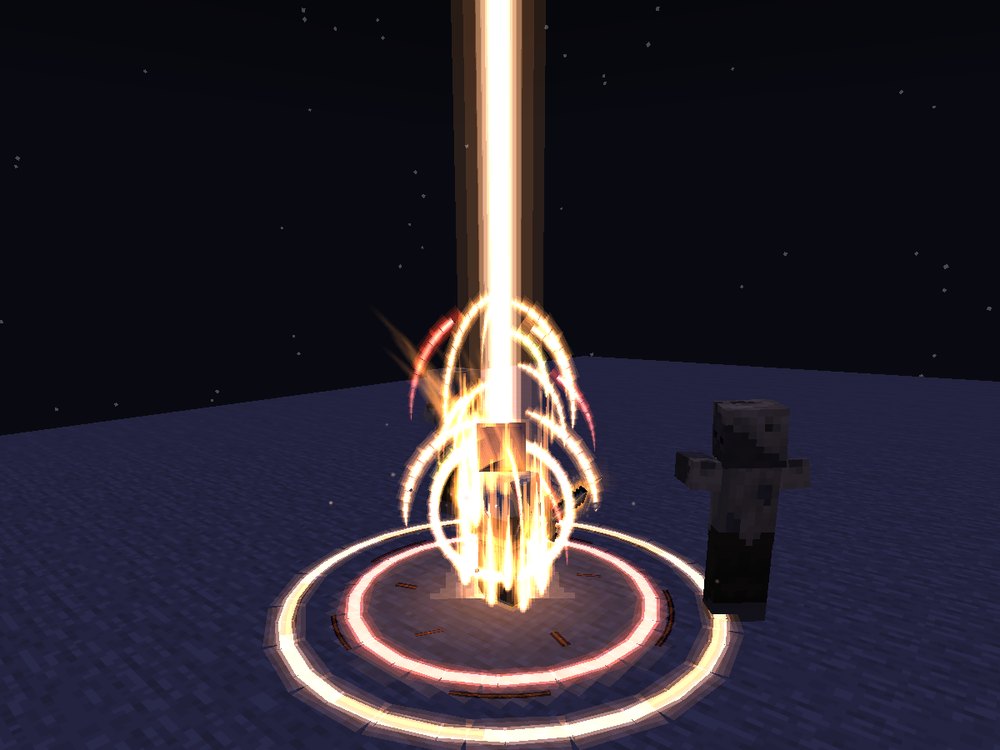 The moment of awakening, Ember Breath at Form.
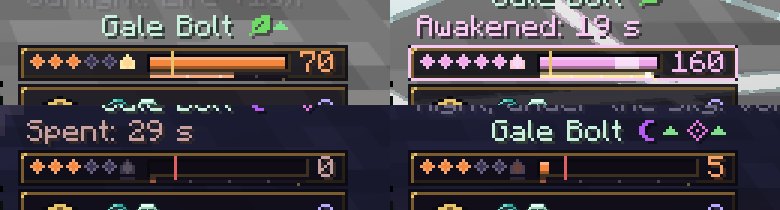 The aura bar ready, awakened, spent, and resting.
Tips and counterplay
- Awaken to finish a fight, not to start one. A spent swordsman is easy prey for half a minute.
- Against players an awakening is modest: its extra damage is capped like aura’s other bonuses, and its holds are as short as any art’s.
The spellblade
From Edge, cast a spell while sneaking with your blade in hand and the spell flows into the blade instead of leaving. Your next Aura Slash within 5 seconds carries it: the spell lands on the first few foes the slash cuts, or bursts where the slash breaks. You pay both the spell’s mana and the slash’s aura. If you don’t slash in time, the spell leaves as normal. Self spells, secret spells and overchannelled spells never ride a blade.
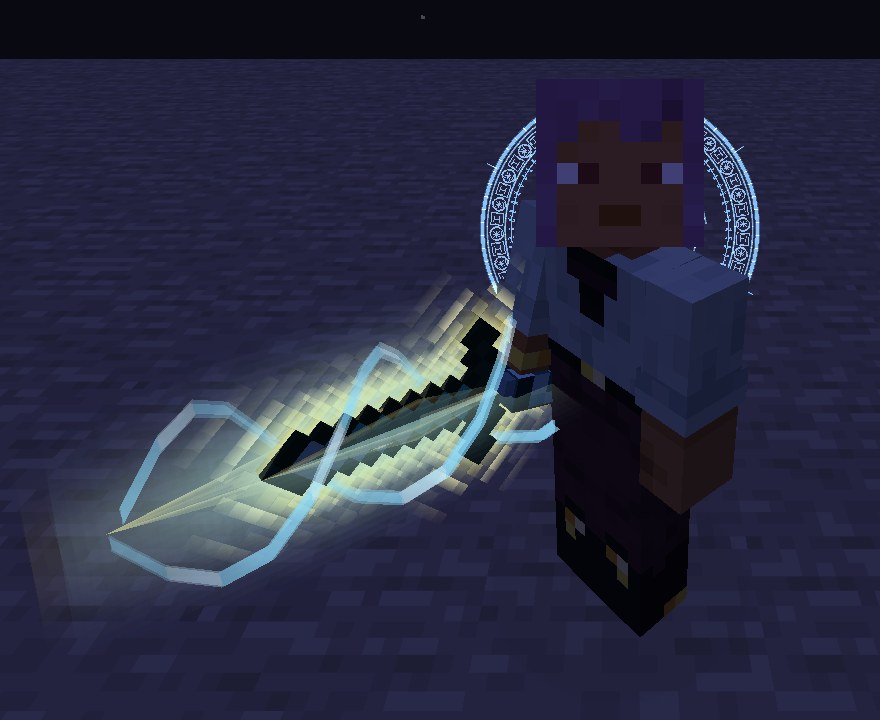
Blade and spell together
Aura marks
A coated blow or slash sometimes leaves its element’s reaction mark on a foe for a mage to set off (15% at Glow, 5% more each stage). A method never sets off its own mark.
Resonant Strikes
Land elemental spell damage and a full coated swing, slash or art on one foe within about a second for a Resonant Strike.
Breakthroughs
How to get one
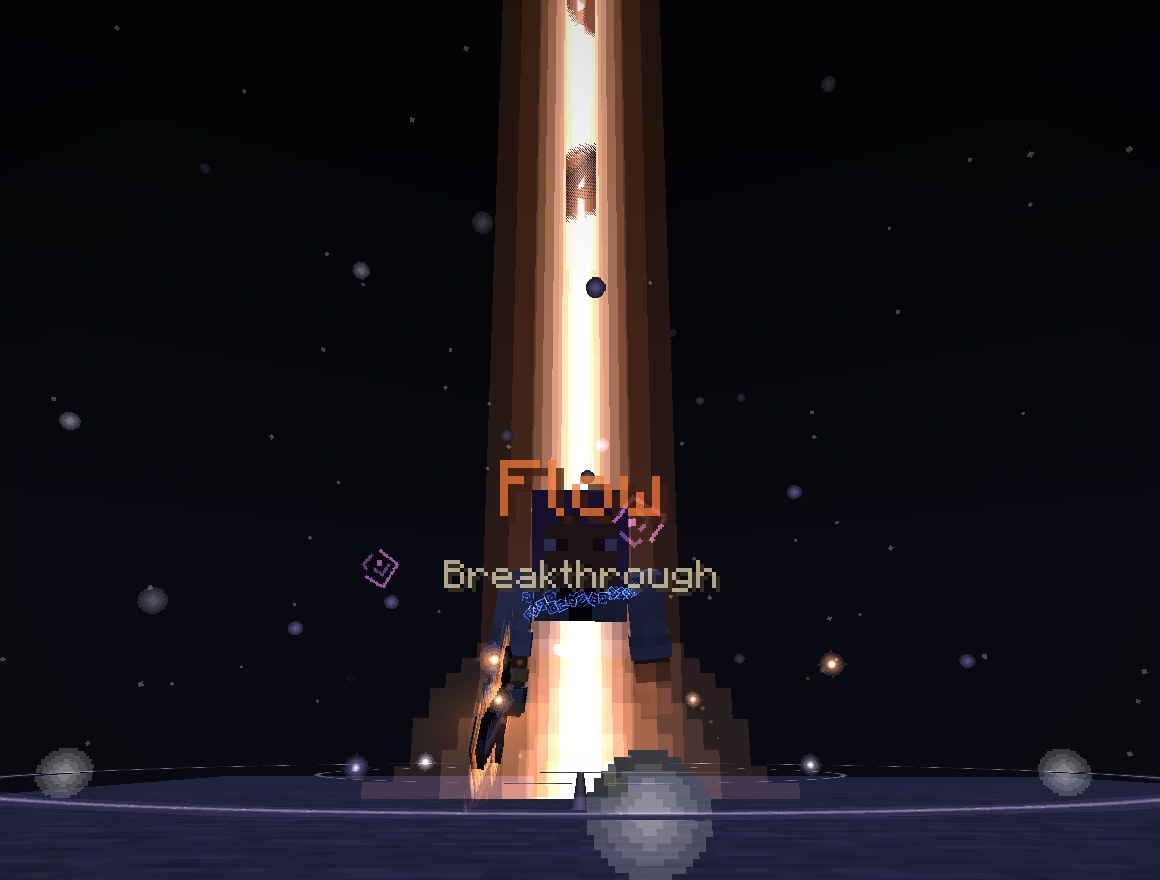
You grow by landing full swings on real foes, more when you’re in danger and against bosses or stronger foes. At a stage’s limit the next diamond on the aura bar pulses gold and a breakthrough waits. Reach the total experience, then pass one trial:
| Next stage | Total experience | Trials (any one) |
|---|---|---|
| Flow | 450 | Stillness: 30 seconds of breathing stance where ley lines cross, or at a qualifying waterfall or summit. Stronger foe: fell a boss, Runebound or a foe with twice your health with blade and aura only, within 60 seconds |
| Edge | 1,800 | The same as Flow |
| Form | 5,400 | Tempest: 45 seconds of stance at a ley crossing in an open-sky thunderstorm. Guardian: fell a boss with blade and aura only within 3 minutes. Duel: beat a wandering duelist without magic |
| Sovereign | 13,500 | Tempest for 60 seconds, the guardian trial, or the duel |
Any spell of yours touching a trial foe spoils the trial. See Ley Lines. A formal disciple can also break through by knocking out their own master in a spar, up to one stage below the master (see Sparring and Lineage).
Tips: if your rank seems stuck
- The experience bar waits for the trial. More fighting won’t push past it.
- Training Dummies, the practice arena and waterfall or summit breathing share a 40 experience lifetime practice limit. If you stall around 40, fight real hostile foes. Animals and pets teach nothing.
- Only full swings with your own aura weapon count. The breathing stance restores aura but gives no experience.
- Open the Cord screen (
K) and choose Aura: hover the experience line for the rules.
The Aura page
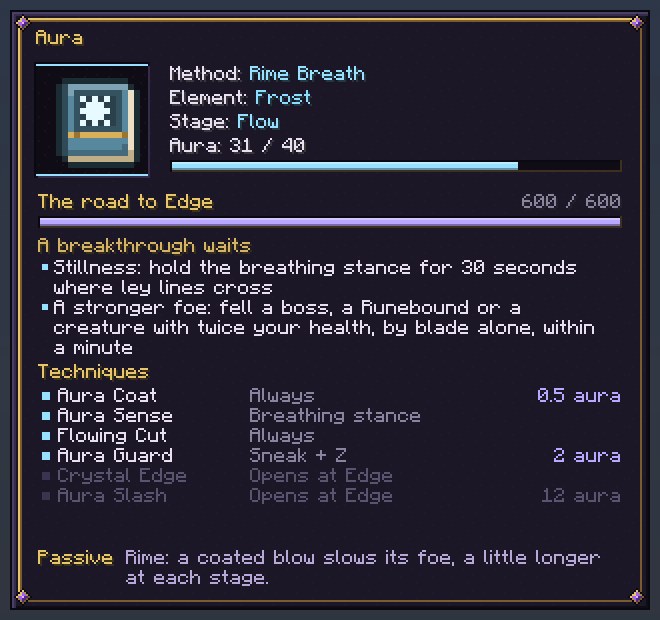
Open the Cord screen (K) and click the Aura badge (it’s there even without a Cord). Tabs:
- Aura: your method, stage, pool, next breakthrough and its trials, and every technique.
- Sword strings: your arts, their strings, prices at your momentum, and your finisher. Click a method’s colour to browse it.
- Way: the Way tree.
- Writing: techniques of your own.
- Blade: your bonded blade.
Duels with a duelist
Wandering duelists teach their method to anyone who beats them. Use one with a blade in hand, then use it again within ten seconds to accept.
- It meets you at your stage and has a tell for every move: a raised guard (from Flow), a blade held high before a slash (from Edge), a low crouch before a dash (from Form).
- Nobody dies. A beaten duelist yields; if you fall you’re knocked out on one heart and restored. Leaving forfeits; after five minutes it’s a draw.
- Winning teaches its method (or gives its manual if you already have one), a little experience and a Grimoire entry. Winning without magic counts as a Form or Sovereign trial.
- Lose, and it waits half a minute before you can try again.
Aura-forged gear
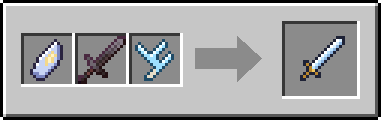
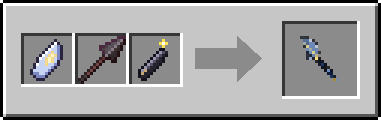
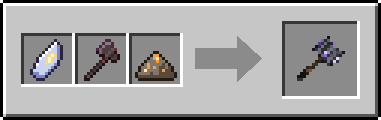
Fallen knights sometimes drop an Aura Shard. At a smithing table it forges a diamond or netherite weapon with a reagent. The weapon keeps its damage, enchantments and durability, and gains a gift:
| Forging | From | With | Gift |
|---|---|---|---|
| Lumenedge | Sword | Lumen Antler | More aura from every blow |
| Skyrend Glaive | Spear | Fulgurite Shard | A stronger, longer, wider Aura Slash |
| Bulwark Maul | Axe | Geode Grit | A much cheaper Aura Guard |
More on these on Weapons.
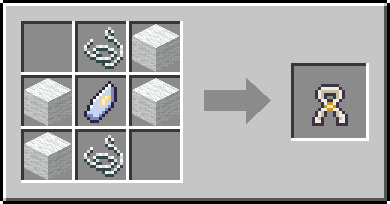
The Breath Sash goes in the Tome of the Fifth Page slot (or your off-hand with that slot empty). It holds a quarter more aura, and your breathing stance settles twice as fast and breathes in half again as much. A swordsman’s choice against a fifth spell.
Aura and other players
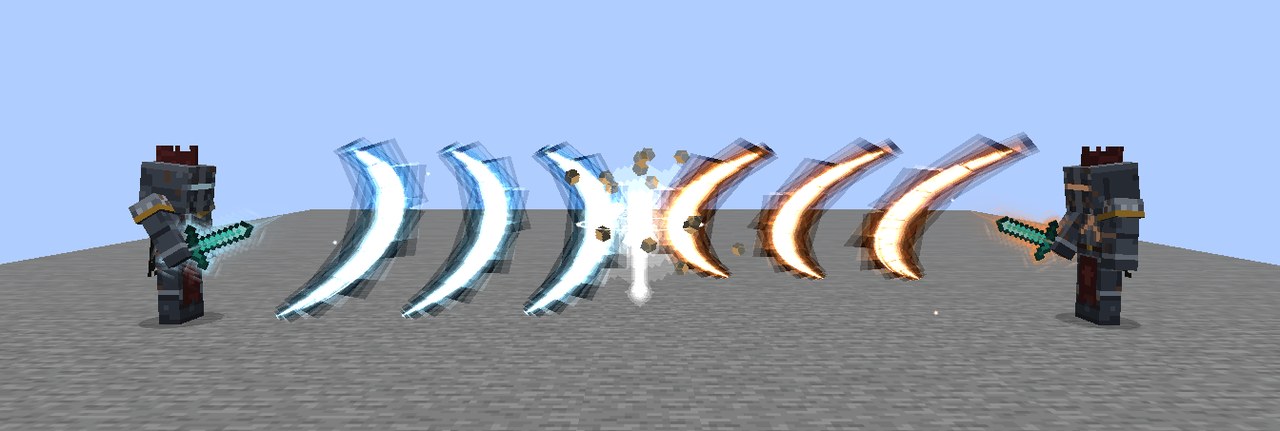
- Aura blows are ordinary blows, so armour counts. What aura adds against a player is capped and scaled like a spell’s bonuses, and the slash meets spell defences in full.
- Intent only presses on a player with a lower stage. A player inside a foe’s Dominion is weakened and slowed less than a creature.
- A held guard halves a slash from in front; a perfect guard sends it back.
- Two slashes meeting break together, or lock into a timed clash (see Sparring and Lineage).
- Teams and the server’s PvP rule are respected.
Looks, sound and settings
Your blade leaves trails cut the way you swung, your body shows your stage and flares in a fight, full swings land with a short hit-stop, and techniques name themselves in a banner. Each method has its own colour and sound. In first person, nothing fills the middle of your screen.
All of it can be tuned in Magic visual settings (assign it a key in Minecraft’s Controls): blade trails, body aura, impact, banners, camera motion and reduced flash. See Combat presentation.
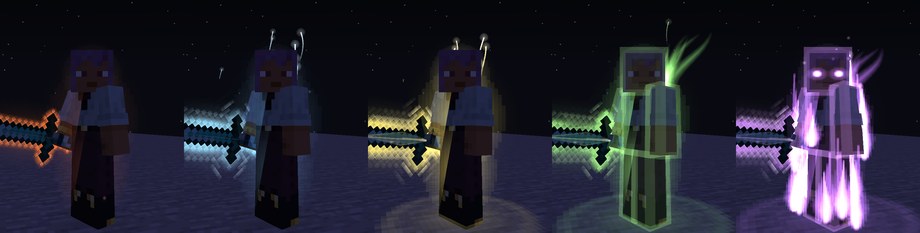 Glow to Sovereign in a fight (Ember, Rime, Thunder, Verdant, Hollow).
Where to train next
- Sword Masters: duel the Masters for techniques and Master Forms.
- Marchkeeper battlefields: histories and technique intents.
- Sword Tombs: intent gates and the Buried Keeper.
- The Sleeping Blade: Oathkeeper, from Form.
- Highland Beasts: foes that resist spells and reward a blade.