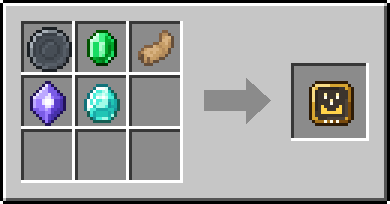
Modifiers
A modifier changes the closest rune on its left that it can change. Amplify needs something with power, so in Bolt · Fire · Amplify it strengthens Fire; Split needs something that can split, so in Bolt · Fire · Split it skips Fire and doubles the Bolt. A modifier never reaches back past a link. Modifiers multiply the cost of what they change.
69 modifiers, by tier.
 Amplify
Tier I · cost x1.5 · needs any Cord
+50% power (damage, healing, force, blast).
How to get it: Craft: a Blank Rune, Gold Ingot. The recipe is shapeless: any layout, any crafting grid. Also found: Dungeons; Mineshafts.
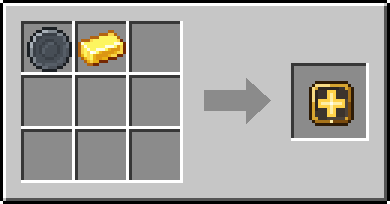
Attaches to: the closest rune on its left that is anything with power (damage, healing, force).
 Cushioned
Tier I · cost x1.1 · needs any Cord
Whoever it moves takes no fall damage on their next landing (10 seconds).
How to get it: Craft: a Blank Rune, Hay Bale and Feather. The recipe is shapeless: any layout, any crafting grid.
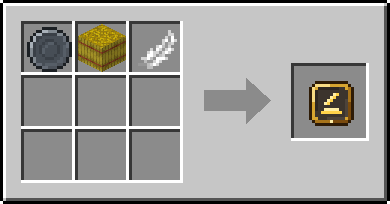
 Damp
Damp
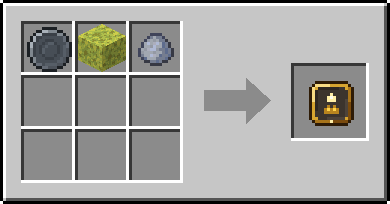
Tier I · cost x1 · needs any Cord
Fire it starts on blocks goes straight out; creatures still burn.
How to get it: Craft: a Blank Rune, Wet Sponge and Clay Ball. The recipe is shapeless: any layout, any crafting grid.
 Extend
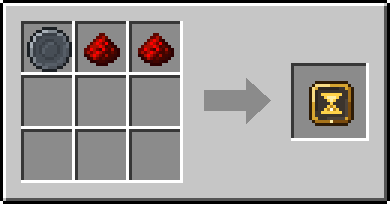
Tier I · cost x1.4 · needs any Cord
+100% duration. At most three per target rune.
How to get it: Craft: a Blank Rune, 2x Redstone Dust. The recipe is shapeless: any layout, any crafting grid. Also found: Dungeons; Mineshafts.
Attaches to: the closest rune on its left that is anything that lasts.
 Fetching
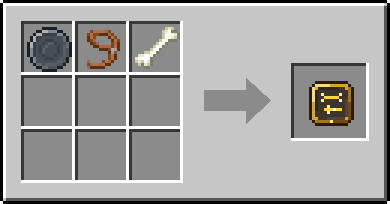
Tier I · cost x1.1 · needs any Cord
The loot of creatures it kills lands at your feet.
How to get it: Craft: a Blank Rune, Lead and Bone. The recipe is shapeless: any layout, any crafting grid.
 Fleecing
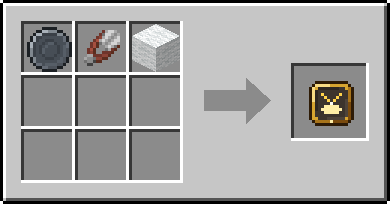
Tier I · cost x1 · needs any Cord
Sheep it reaches are shorn; the wool lands at your feet.
How to get it: Craft: a Blank Rune, Shears and White Wool. The recipe is shapeless: any layout, any crafting grid.
Attaches to: the closest rune on its left that is any effect.
 Frugal
Tier I · cost x0.5 · needs any Cord
Half the mana, but 40% weaker and shorter.
How to get it: Craft: a Blank Rune, Emerald. The recipe is shapeless: any layout, any crafting grid. Also found: Dungeons; Mineshafts.
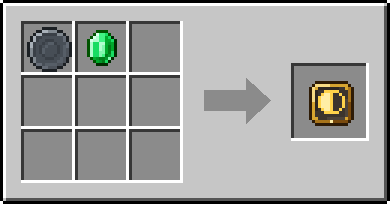
Attaches to: the closest rune on its left that is any effect.
 Furrowing
Tier I · cost x1.1 · needs any Cord
Tills grass and dirt within 2 blocks of where it lands into farmland.
How to get it: Craft: a Blank Rune, Iron Hoe and Dirt. The recipe is shapeless: any layout, any crafting grid.
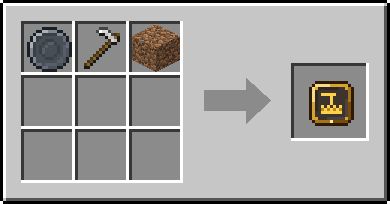
Attaches to: the closest rune on its left that is any effect.
 Gentle
Tier I · cost x1 · needs any Cord
Passes over farm animals, pets and villagers.
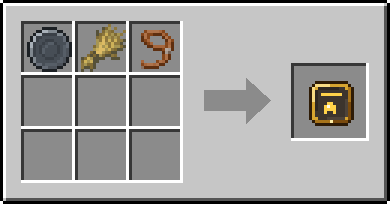
How to get it: Craft: a Blank Rune, Wheat Crops and Lead. The recipe is shapeless: any layout, any crafting grid.
 Level Ground
Tier I · cost x1 · needs any Cord
Never breaks a block below your feet, so you can’t dig yourself a pit.
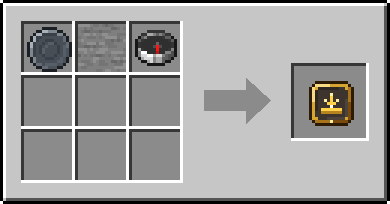
How to get it: Craft: a Blank Rune, Stone Slab and Compass. The recipe is shapeless: any layout, any crafting grid.
 Magnetic
Tier I · cost x1.1 · needs any Cord
Items within 6 blocks of where it lands fly to you.
How to get it: Craft: a Blank Rune, Iron Ingot and Redstone Dust. The recipe is shapeless: any layout, any crafting grid.
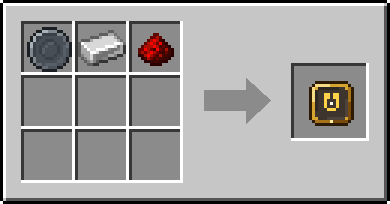
Attaches to: the closest rune on its left that is any effect.
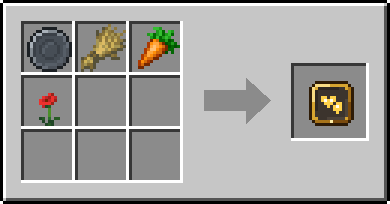
 Matchmaking
Tier I · cost x1 · needs any Cord
Grown animals it lands on fall in love.
How to get it: Craft: a Blank Rune, Wheat Crops, Carrot and Poppy. The recipe is shapeless: any layout, any crafting grid.
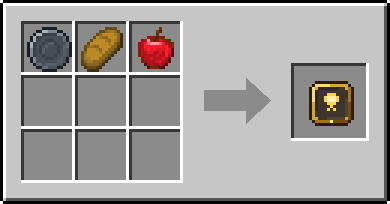
 Nourishing
Tier I · cost x1.1 · needs any Cord
Also feeds each player it lands on 3 hunger.
How to get it: Craft: a Blank Rune, Bread and Apple. The recipe is shapeless: any layout, any crafting grid.
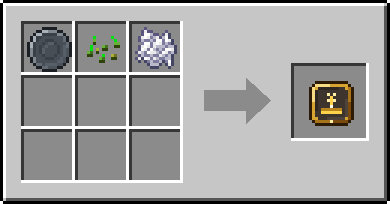
 Replanting
Tier I · cost x1.1 · needs any Cord
Ripe crops it breaks are replanted from their own seeds.
How to get it: Craft: a Blank Rune, Wheat Seeds and Bone Meal. The recipe is shapeless: any layout, any crafting grid.
 Reservoir Circle
Tier I · cost x0.75 · needs any Cord
Filling concentric basins: 25% less mana, 20% less power and 15% shorter effect durations.
How to get it: Craft: a Blank Rune, Glass Bottle and Lapis Lazuli. The recipe is shapeless: any layout, any crafting grid.
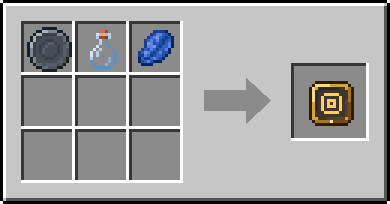
Attaches to: the closest rune on its left that is any shape (one circle discipline per shape).
 Soothing
Tier I · cost x1 · needs any Cord
Creatures it lands on forget their anger at you; 30% weaker.
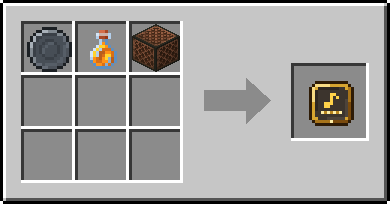
How to get it: Craft: a Blank Rune, Honey Bottle and Note Block. The recipe is shapeless: any layout, any crafting grid.
 Sowing
Tier I · cost x1.1 · needs any Cord
Plants seeds from your pack on bare farmland within 3 blocks of where it lands.
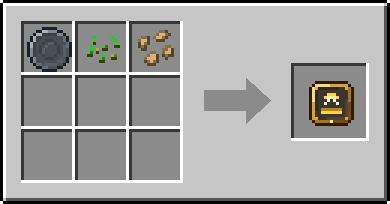
How to get it: Craft: a Blank Rune, Wheat Seeds and Beetroot Seeds. The recipe is shapeless: any layout, any crafting grid.
Attaches to: the closest rune on its left that is any effect.
 Sparing
Tier I · cost x1 · needs any Cord
Passes over other players and their pets.
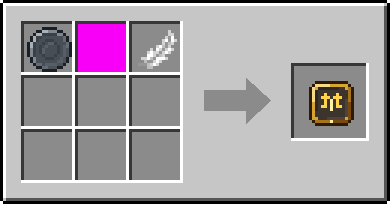
How to get it: Craft: a Blank Rune, White Banner and Feather. The recipe is shapeless: any layout, any crafting grid.
 Steady
Tier I · cost x0.9 · needs any Cord
The effect can’t break any block, and costs 10% less. Not with block modifiers.
How to get it: Craft: a Blank Rune, Obsidian and Iron Nugget. The recipe is shapeless: any layout, any crafting grid.
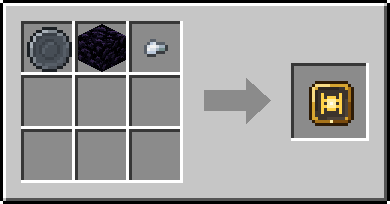
Attaches to: the closest rune on its left that is any effect.
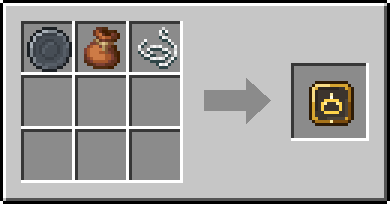
 Tidy
Tidy
Tier I · cost x1.1 · needs any Cord
Blocks it breaks drop straight into your pack; what doesn’t fit lands at your feet.
How to get it: Craft: a Blank Rune, Bundle and String. The recipe is shapeless: any layout, any crafting grid.
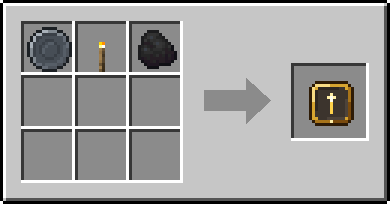
 Torchset
Tier I · cost x1 · needs any Cord
If it lands somewhere dark, sets a torch there from your pack.
How to get it: Craft: a Blank Rune, Torch and Coal. The recipe is shapeless: any layout, any crafting grid.
Attaches to: the closest rune on its left that is any effect.
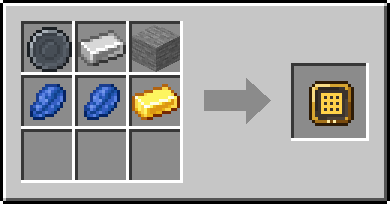
 Anchor Circle
Tier II · cost x1.25 · needs a Copper Cord or better
A locked square lattice: effect durations last 40% longer at 15% less power. Costs 25% more mana; terrain lifetime caps still apply.
How to get it: Craft: a Blank Rune, Iron Ingot and Stone, plus 2 Lapis Lazuli and a Gold Ingot. The recipe is shapeless: any layout, any crafting grid.
Attaches to: the closest rune on its left that is any shape (one circle discipline per shape).
 Belated
Tier II · cost x1.25 · needs a Copper Cord or better
The effect lands 1.5 seconds late, but 25% stronger.
How to get it: Craft: a Blank Rune, Clock and Cobweb, plus 2 Lapis Lazuli and a Gold Ingot. The recipe is shapeless: any layout, any crafting grid.
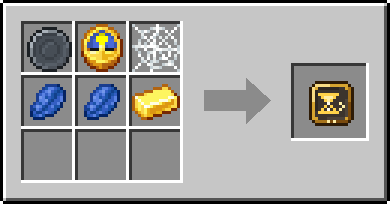
Attaches to: the closest rune on its left that is anything with power (damage, healing, force).
 Bloom Circle
Tier II · cost x1.15 · needs a Copper Cord or better
Six unfolding petals: 35% larger shape radius, 20% less power. Costs 15% more mana.
How to get it: Craft: a Blank Rune, Pink Petals and Bone Meal, plus 2 Lapis Lazuli and a Gold Ingot. The recipe is shapeless: any layout, any crafting grid.
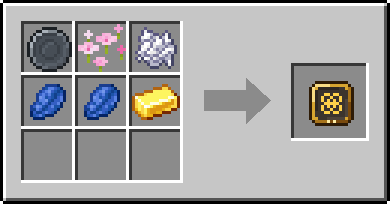
Attaches to: the closest rune on its left that is any shape (one circle discipline per shape).
 Bounce
Tier II · cost x1.3 · needs a Copper Cord or better
Bounces off blocks up to 3 times.
How to get it: Craft: a Blank Rune, Slime Block, plus 2 Lapis Lazuli and a Gold Ingot. The recipe is shapeless: any layout, any crafting grid. Also found: Shipwrecks; Buried treasure; Trial vaults.
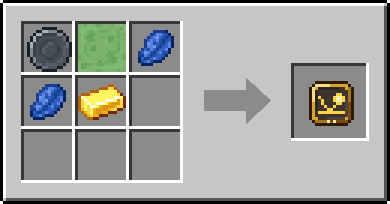
Attaches to: the closest rune on its left that is projectiles.
 Bountiful
Tier II · cost x1.2 · needs a Copper Cord or better
Creatures it kills drop twice the experience, even untouched by your hand.
How to get it: Craft: a Blank Rune, Bottle o’ Enchanting and Emerald, plus 2 Lapis Lazuli and a Gold Ingot. The recipe is shapeless: any layout, any crafting grid.
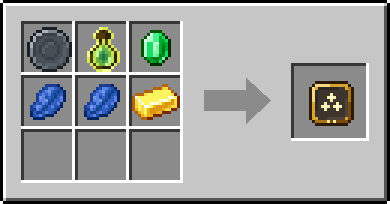
 Crucible Circle
Tier II · cost x1.2 · needs a Copper Cord or better
A breathing furnace hexagon: 15% more power and 25% shorter effect durations. Costs 20% more mana.
How to get it: Craft: a Blank Rune, Blaze Powder and Brick, plus 2 Lapis Lazuli and a Gold Ingot. The recipe is shapeless: any layout, any crafting grid.
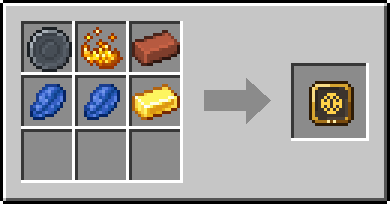
Attaches to: the closest rune on its left that is any shape (one circle discipline per shape).
 Culling
Tier II · cost x1.1 · needs a Copper Cord or better
Lands only on monsters, 20% stronger; everything else is passed over.
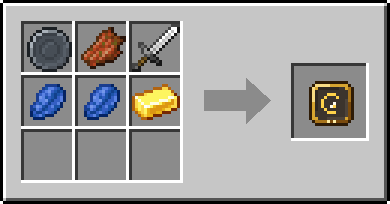
How to get it: Craft: a Blank Rune, Rotten Flesh and Iron Sword, plus 2 Lapis Lazuli and a Gold Ingot. The recipe is shapeless: any layout, any crafting grid.
 Execute
Tier II · cost x1.3 · needs a Copper Cord or better
Double power against targets under half health. One per effect.
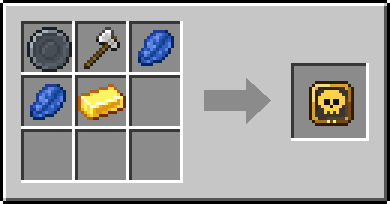
How to get it: Craft: a Blank Rune, Iron Axe, plus 2 Lapis Lazuli and a Gold Ingot. The recipe is shapeless: any layout, any crafting grid. Also found: Shipwrecks; Buried treasure; Trial vaults.
Attaches to: the closest rune on its left that is anything with power (damage, healing, force).
 Fertile
Tier II · cost x1.2 · needs a Copper Cord or better
Crops and saplings within 3 blocks of where it lands grow a stage.
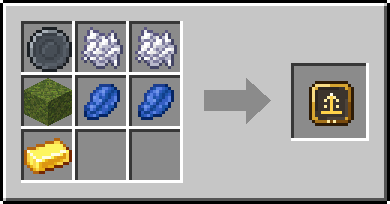
How to get it: Craft: a Blank Rune, 2x Bone Meal and Moss Block, plus 2 Lapis Lazuli and a Gold Ingot. The recipe is shapeless: any layout, any crafting grid.
Attaches to: the closest rune on its left that is any effect.
 Focus
Focus
Tier II · cost x1.2 · needs a Copper Cord or better
Half the radius, +50% power. At most two per target rune.
How to get it: Craft: a Blank Rune, Glass Pane and Gold Nugget, plus 2 Lapis Lazuli and a Gold Ingot. The recipe is shapeless: any layout, any crafting grid. Also found: Shipwrecks; Buried treasure; Trial vaults.
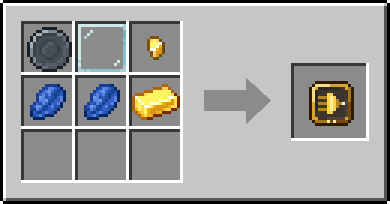
Attaches to: the closest rune on its left that is anything with an area.
 Gyre Circle
Tier II · cost x1.15 · needs a Copper Cord or better
Counter-turning turbines: flying shapes travel 30% faster at 15% less power. Costs 15% more mana.
How to get it: Craft: a Blank Rune, Feather and Copper Ingot, plus 2 Lapis Lazuli and a Gold Ingot. The recipe is shapeless: any layout, any crafting grid.
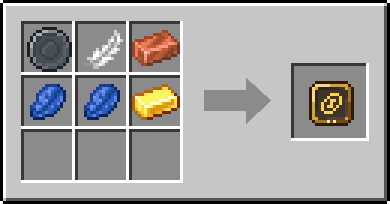
Attaches to: the closest rune on its left that is any shape (one circle discipline per shape).
 Hallowed
Tier II · cost x1.2 · needs a Copper Cord or better
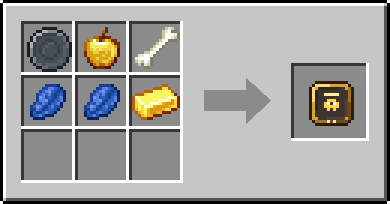
Twice as strong on the undead; the living are passed over.
How to get it: Craft: a Blank Rune, Golden Apple and Bone, plus 2 Lapis Lazuli and a Gold Ingot. The recipe is shapeless: any layout, any crafting grid.
 Inward
Tier II · cost x1 · needs a Copper Cord or better
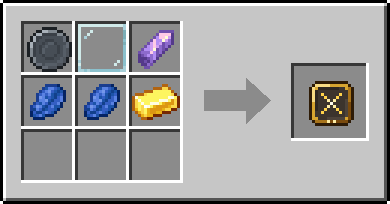
Lands on you alone, 40% stronger. Not with Selfless.
How to get it: Craft: a Blank Rune, Glass Pane and Amethyst Shard, plus 2 Lapis Lazuli and a Gold Ingot. The recipe is shapeless: any layout, any crafting grid.
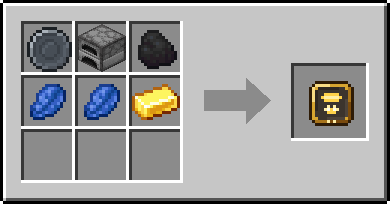
 Kilned
Tier II · cost x1.25 · needs a Copper Cord or better
What it breaks drops already smelted, with no fuel. Only one drop rule per effect.
How to get it: Craft: a Blank Rune, Furnace and Coal, plus 2 Lapis Lazuli and a Gold Ingot. The recipe is shapeless: any layout, any crafting grid.
 Kindred
Tier II · cost x1.4 · needs a Copper Cord or better
Shares a helpful effect: it also lands on you and on the nearest ally it missed within 8 blocks, at half power.
How to get it: Craft: a Blank Rune, Cake, plus 2 Lapis Lazuli and a Gold Ingot. The recipe is shapeless: any layout, any crafting grid.
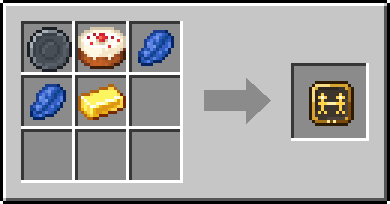
Attaches to: the closest rune on its left that is a helpful effect that lands on each creature it touches (healing, a buff, a ward).
 Linger
Tier II · cost x1.8 · needs a Copper Cord or better
The effect lands twice more, a second apart.
How to get it: Craft: a Blank Rune, Honey Bottle, plus 2 Lapis Lazuli and a Gold Ingot. The recipe is shapeless: any layout, any crafting grid. Also found: Shipwrecks; Buried treasure; Trial vaults; Stronghold libraries.
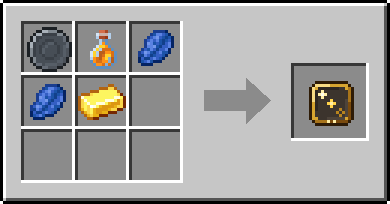
Attaches to: the closest rune on its left that is effects that can land again over time.
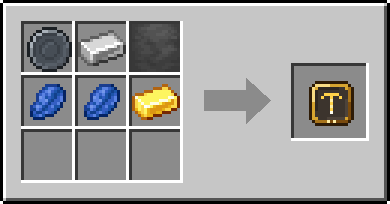
 Mending
Tier II · cost x1.2 · needs a Copper Cord or better
Also mends 10 durability on each target’s held item and armour.
How to get it: Craft: a Blank Rune, Iron Ingot and Anvil, plus 2 Lapis Lazuli and a Gold Ingot. The recipe is shapeless: any layout, any crafting grid.
 Mercy Circle
Tier II · cost x1.15 · needs a Copper Cord or better
Paired sheltering crescents: helpful effects gain 20% power; other effects lose 25%. Costs 15% more mana.
How to get it: Craft: a Blank Rune, Honey Bottle and Poppy, plus 2 Lapis Lazuli and a Gold Ingot. The recipe is shapeless: any layout, any crafting grid.
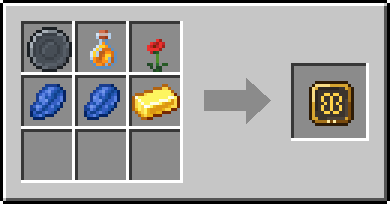
Attaches to: the closest rune on its left that is any shape (one circle discipline per shape).
 Needle Circle
Tier II · cost x1.2 · needs a Copper Cord or better
A closing iris: 35% smaller shape radius, 20% more power. Costs 20% more mana. One circle discipline per shape.
How to get it: Craft: a Blank Rune, Flint and Iron Nugget, plus 2 Lapis Lazuli and a Gold Ingot. The recipe is shapeless: any layout, any crafting grid.
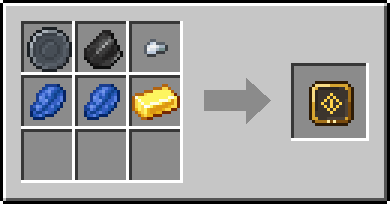
Attaches to: the closest rune on its left that is any shape (one circle discipline per shape).
 Ore Sensing
Tier II · cost x1.2 · needs a Copper Cord or better
Ores within 8 blocks of where it lands glimmer for 10 seconds.
How to get it: Craft: a Blank Rune, Spyglass and Raw Gold, plus 2 Lapis Lazuli and a Gold Ingot. The recipe is shapeless: any layout, any crafting grid.
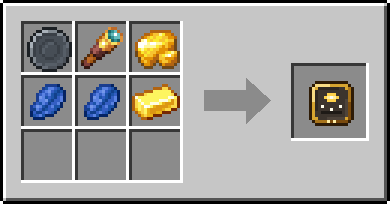
Attaches to: the closest rune on its left that is any effect.
 Pierce
Tier II · cost x1.3 · needs a Copper Cord or better
Passes through up to 3 targets.
How to get it: Craft: a Blank Rune, 2x Arrow, plus 2 Lapis Lazuli and a Gold Ingot. The recipe is shapeless: any layout, any crafting grid. Also found: Shipwrecks; Buried treasure; Trial vaults.
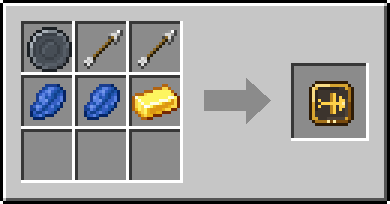
Attaches to: the closest rune on its left that is projectiles and beams.
 Pilgrim Circle
Tier II · cost x1.1 · needs a Copper Cord or better
A rolling compass: 15% more power when released while moving horizontally, otherwise 10% less; 10% shorter effect durations. Costs 10% more mana.
How to get it: Craft: a Blank Rune, Compass and Feather, plus 2 Lapis Lazuli and a Gold Ingot. The recipe is shapeless: any layout, any crafting grid.
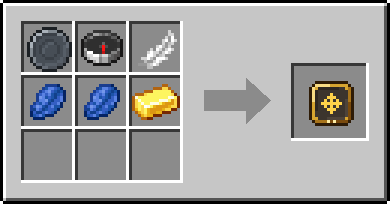
Attaches to: the closest rune on its left that is any shape (one circle discipline per shape).
 Pooled
Tier II · cost x1.1 · needs a Copper Cord or better
Double power, shared evenly between every creature it reaches.
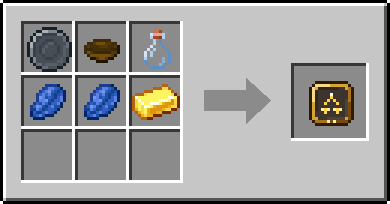
How to get it: Craft: a Blank Rune, Bowl and Glass Bottle, plus 2 Lapis Lazuli and a Gold Ingot. The recipe is shapeless: any layout, any crafting grid.
 Purifying
Tier II · cost x1.2 · needs a Copper Cord or better
Also lifts one harmful effect from each target.
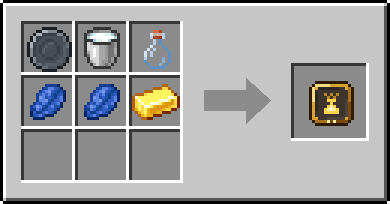
How to get it: Craft: a Blank Rune, Milk Bucket and Glass Bottle, plus 2 Lapis Lazuli and a Gold Ingot. The recipe is shapeless: any layout, any crafting grid.
 Quicken
Tier II · cost x1.2 · needs a Copper Cord or better
Bolts fly twice as fast; delays are halved. On fields, walls, totems, domains, latches, streams and barrages it makes the same strikes come twice as fast, so the spell ends sooner.
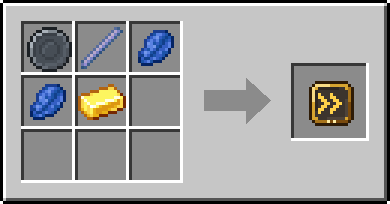
How to get it: Craft: a Blank Rune, Breeze Rod, plus 2 Lapis Lazuli and a Gold Ingot. The recipe is shapeless: any layout, any crafting grid. Also found: Shipwrecks; Buried treasure; Trial vaults.
Attaches to: the closest rune on its left that is anything that flies.
 Rapid
Rapid
Tier II · cost x1.4 · needs a Copper Cord or better
Halves the whole spell’s cooldown.
How to get it: Craft: a Blank Rune, Sugar and Redstone Dust, plus 2 Lapis Lazuli and a Gold Ingot. The recipe is shapeless: any layout, any crafting grid. Also found: Shipwrecks; Buried treasure; Trial vaults.
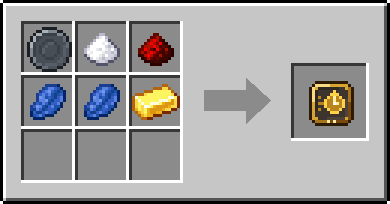
Attaches to: the closest rune on its left that is any shape (it changes the whole spell, so its cost multiplies the whole spell’s, wherever it sits).
 Selfless
Tier II · cost x1 · needs a Copper Cord or better
Skips you and lands on the others 30% stronger. Not with Inward.
How to get it: Craft: a Blank Rune, Poppy and Gold Nugget, plus 2 Lapis Lazuli and a Gold Ingot. The recipe is shapeless: any layout, any crafting grid.
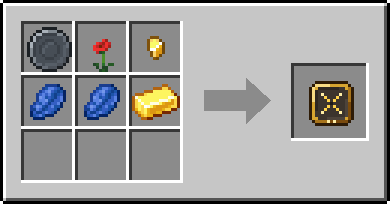
 Silken
Tier II · cost x1.3 · needs a Copper Cord or better
Blocks it breaks drop themselves, as with Silk Touch. Only one drop rule per effect.
How to get it: Craft: a Blank Rune, String and White Wool, plus 2 Lapis Lazuli and a Gold Ingot. The recipe is shapeless: any layout, any crafting grid.
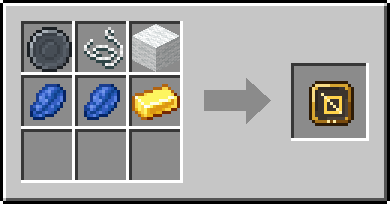
 Sunlit
Tier II · cost x1 · needs a Copper Cord or better
Twice as strong under open daylight sky; half as strong anywhere else.
How to get it: Craft: a Blank Rune, Sunflower and Gold Ingot, plus 2 Lapis Lazuli and a Gold Ingot. The recipe is shapeless: any layout, any crafting grid.
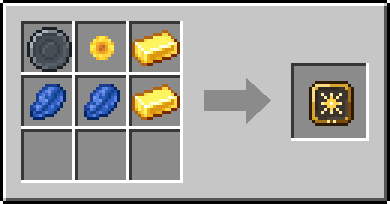
Attaches to: the closest rune on its left that is any effect.
 Tapering
Tier II · cost x1.1 · needs a Copper Cord or better
The first creature takes 50% more; each after takes a quarter less than the one before.
How to get it: Craft: a Blank Rune, Arrow and Flint, plus 2 Lapis Lazuli and a Gold Ingot. The recipe is shapeless: any layout, any crafting grid.
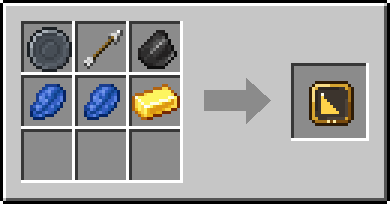
 Thirst
Tier II · cost x1.4 · needs a Copper Cord or better
You heal for a quarter of the damage the effect deals.
How to get it: Craft: a Blank Rune, Spider Eye and Glass Bottle, plus 2 Lapis Lazuli and a Gold Ingot. The recipe is shapeless: any layout, any crafting grid.
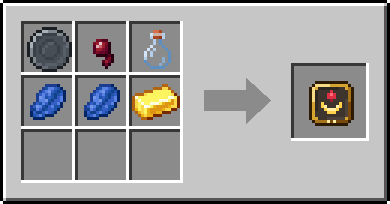
Attaches to: the closest rune on its left that is anything with power (damage, healing, force).
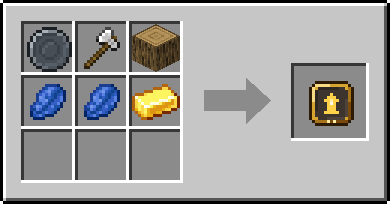
 Timbering
Tier II · cost x1.3 · needs a Copper Cord or better
Breaking a log fells up to 24 more logs of the tree above it.
How to get it: Craft: a Blank Rune, Iron Axe and Oak Log, plus 2 Lapis Lazuli and a Gold Ingot. The recipe is shapeless: any layout, any crafting grid.
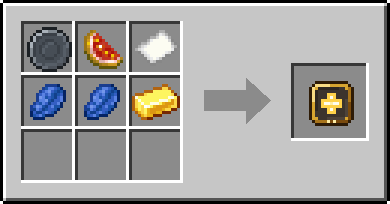
 Triage
Tier II · cost x1.1 · needs a Copper Cord or better
Lands only on the most hurt creature it reaches, 60% stronger.
How to get it: Craft: a Blank Rune, Glistering Melon Slice and Paper, plus 2 Lapis Lazuli and a Gold Ingot. The recipe is shapeless: any layout, any crafting grid.
 Veinfollow
Tier II · cost x1.3 · needs a Copper Cord or better
Breaking an ore also breaks up to 8 more touching blocks of the same ore.
How to get it: Craft: a Blank Rune, Raw Iron and Raw Copper, plus 2 Lapis Lazuli and a Gold Ingot. The recipe is shapeless: any layout, any crafting grid.
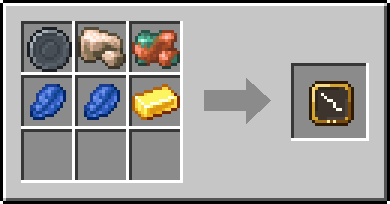
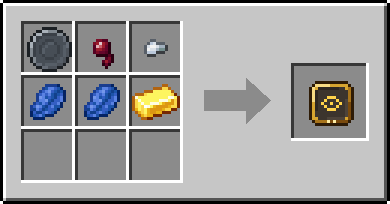
 Vigil Circle
Tier II · cost x1.15 · needs a Copper Cord or better
An opening watchful eye: 20% more power if crouching on release, otherwise 10% less. Flying shapes move 15% slower. Costs 15% more mana.
How to get it: Craft: a Blank Rune, Spider Eye and Iron Nugget, plus 2 Lapis Lazuli and a Gold Ingot. The recipe is shapeless: any layout, any crafting grid.
Attaches to: the closest rune on its left that is any shape (one circle discipline per shape).
 Volley
Tier II · cost x2.4 · needs a Copper Cord or better
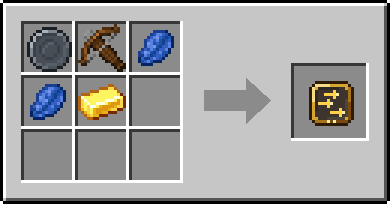
Fires three times in quick succession.
How to get it: Craft: a Blank Rune, Crossbow, plus 2 Lapis Lazuli and a Gold Ingot. The recipe is shapeless: any layout, any crafting grid. Also found: Shipwrecks; Buried treasure; Trial vaults.
Attaches to: the closest rune on its left that is projectiles and beams.
 Widen
Widen
Tier II · cost x1.5 · needs a Copper Cord or better
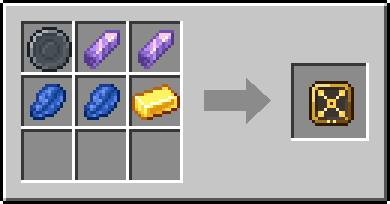
+50% radius.
How to get it: Craft: a Blank Rune, 2x Amethyst Shard, plus 2 Lapis Lazuli and a Gold Ingot. The recipe is shapeless: any layout, any crafting grid. Also found: Shipwrecks; Buried treasure; Trial vaults.
Attaches to: the closest rune on its left that is anything with an area.
 Blood Price
Tier III · cost x1 · needs an Amethyst Cord or better
Pay for the whole spell in health instead of mana: 1 health per 4 mana. Never lethal.
How to get it: Craft: a Blank Rune, Ghast Tear and Redstone Dust, plus a Mana Crystal and a Diamond. The recipe is shapeless: any layout, any crafting grid. Also found: Bastions; Woodland mansions.
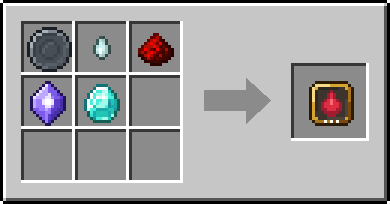
Attaches to: the closest rune on its left that is any shape (it changes the whole spell, so its cost multiplies the whole spell’s, wherever it sits).
 Chain
Chain
Tier III · cost x1.8 · needs an Amethyst Cord or better
After a hit, jumps to up to 3 more enemies within 6 blocks.
How to get it: Craft: a Blank Rune, Iron Chain and Redstone Dust, plus a Mana Crystal and a Diamond. The recipe is shapeless: any layout, any crafting grid. Also found: Trial vaults; Ominous vaults; Ancient cities.
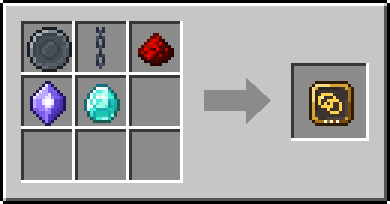
Attaches to: the closest rune on its left that is anything that can jump to a new target.
 Confluence Circle
Tier III · cost x1.2 · needs an Amethyst Cord or better
Braided elemental satellites: power starts at 90%, gaining 8% per distinct visual element in this group, up to 130%. Costs 20% more mana.
How to get it: Craft: a Blank Rune, Amethyst Shard and Prismarine Shard, plus a Mana Crystal and a Diamond. The recipe is shapeless: any layout, any crafting grid.
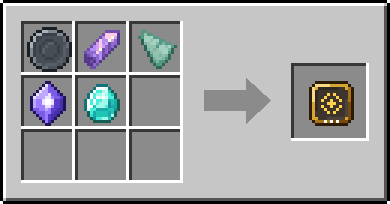
Attaches to: the closest rune on its left that is any shape (one circle discipline per shape).
 Eclipse Circle
Tier III · cost x1.15 · needs an Amethyst Cord or better
A moon passing its sun: 20% more power at night on release, otherwise 10% less. Costs 15% more mana.
How to get it: Craft: a Blank Rune, Ender Pearl and Gold Nugget, plus a Mana Crystal and a Diamond. The recipe is shapeless: any layout, any crafting grid.
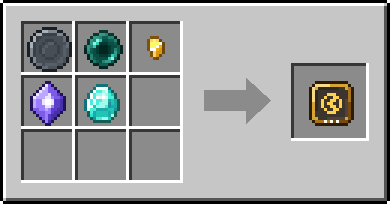
Attaches to: the closest rune on its left that is any shape (one circle discipline per shape).
 Headhunting
Tier III · cost x1.2 · needs an Amethyst Cord or better
Lands only on the healthiest creature it reaches, 60% stronger.
How to get it: Craft: a Blank Rune, Skeleton Skull, Arrow and Spyglass, plus a Mana Crystal and a Diamond. The recipe is shapeless: any layout, any crafting grid.
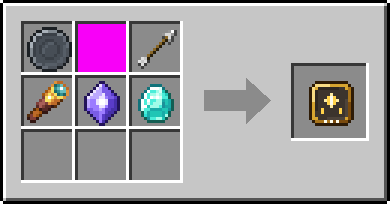
 Homing
Tier III · cost x1.4 · needs an Amethyst Cord or better
Steers toward the nearest enemy within 12 blocks.
How to get it: Craft: a Blank Rune, Compass, plus a Mana Crystal and a Diamond. The recipe is shapeless: any layout, any crafting grid. Also found: End cities; Stronghold libraries; Shulkers (5%).
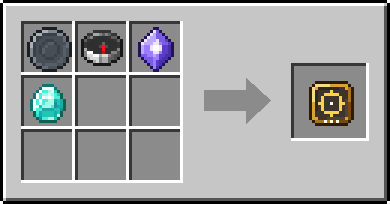
Attaches to: the closest rune on its left that is projectiles.
 Overcharge
Tier III · cost x2.6 · needs an Amethyst Cord or better
+150% power, but 2.6 times the mana.
How to get it: Craft: a Blank Rune, 2x Glowstone, plus a Mana Crystal and a Diamond. The recipe is shapeless: any layout, any crafting grid. Also found: Ominous vaults; Bastions.
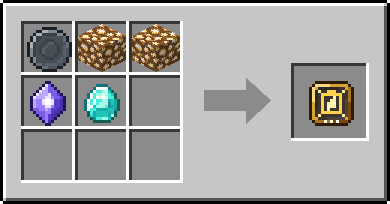
Attaches to: the closest rune on its left that is anything with power (damage, healing, force).
 Split
Split
Tier III · cost x2.4 · needs an Amethyst Cord or better
Three copies of the shape.
How to get it: Craft: a Blank Rune, 2x Prismarine Crystals, plus a Mana Crystal and a Diamond. The recipe is shapeless: any layout, any crafting grid. Also found: Trial vaults; Ominous vaults; Ancient cities.
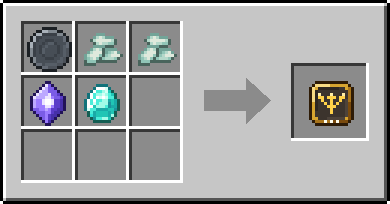
Attaches to: the closest rune on its left that is projectiles and beams.
 Tempest Circle
Tier III · cost x1.2 · needs an Amethyst Cord or better
Forked storm spokes: 20% more power when wet or exposed to rain on release, otherwise 10% less. Flying shapes move 10% faster. Costs 20% more mana.
How to get it: Craft: a Blank Rune, Breeze Rod and Copper Ingot, plus a Mana Crystal and a Diamond. The recipe is shapeless: any layout, any crafting grid.
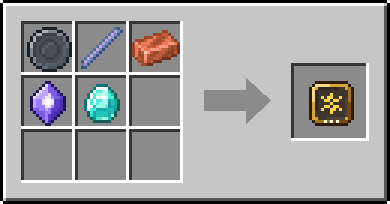
Attaches to: the closest rune on its left that is any shape (one circle discipline per shape).
 Vow
Vow
Tier III · cost x1 · needs an Amethyst Cord or better
A binding vow: the shape’s effects hit twice as hard, but the whole spell’s cooldown is 5x longer. One per shape.
How to get it: Craft: a Blank Rune, Paper and Block of Gold, plus a Mana Crystal and a Diamond. The recipe is shapeless: any layout, any crafting grid. Also found: Ominous vaults; Ancient cities.
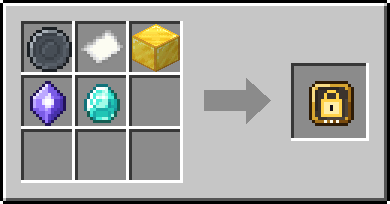
Attaches to: the closest rune on its left that is any shape (it changes the whole spell, so its cost multiplies the whole spell’s, wherever it sits).
 Windfall
Tier III · cost x1.4 · needs an Amethyst Cord or better
Blocks it breaks drop as if mined with Fortune III. Only one drop rule per effect.
How to get it: Craft: a Blank Rune, Emerald and Rabbit’s Foot, plus a Mana Crystal and a Diamond. The recipe is shapeless: any layout, any crafting grid.