The Astral Observatory
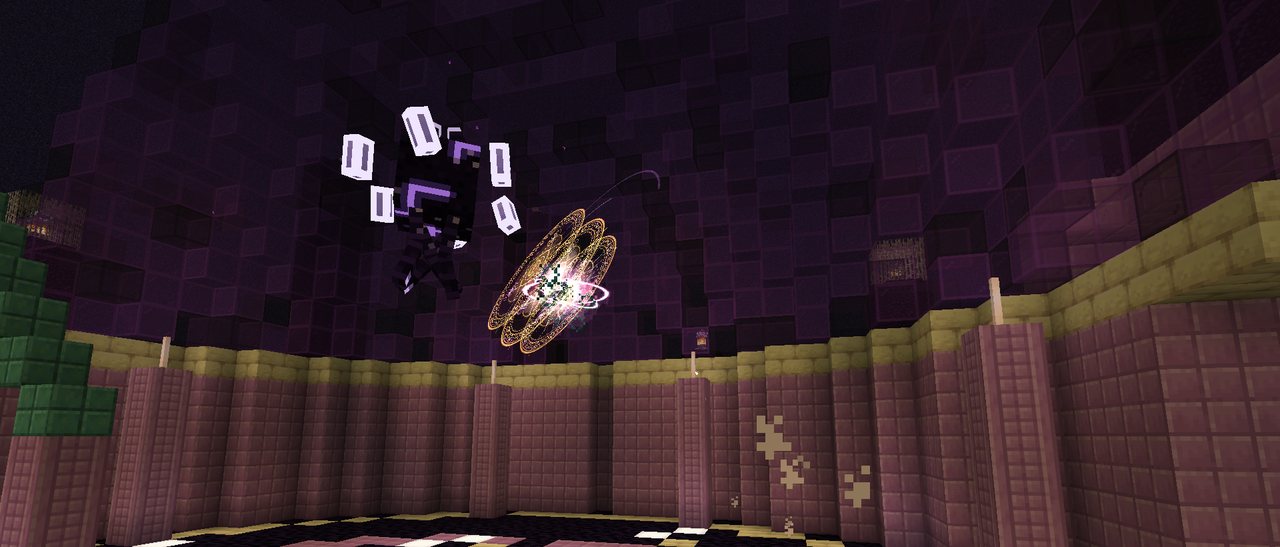 The Star-Eater’s shield turns a spell back on its caster.
What it is
An observatory on the End’s outer islands, kept by the Star-Eater: a floating knot of void with one great eye. Its shield of star shards turns spells back on whoever cast them. To beat it, cast spells heavy enough to break the shield, or knock its own shards back into it.
| Biomes | End highlands and end midlands (the outer islands) |
| How often | About one in every square 512 blocks across |
| Doors | Void and Arcane, then Time and Wind. The vault’s is Void and Life |
| Boss | The Star-Eater, 320 health |
| Its own rune | Starmaw (Tier IV) |
| Trophy | The Astral Lens |
| Runes found only here | Constellation, Eclipse |
How to find it
Reach the outer islands, past the dragon’s island. Look for a dome of purple and black glass with a copper telescope poking out of it, and a terrace of end stone bricks lined with purpur pillars and end rods at the front.
The way in
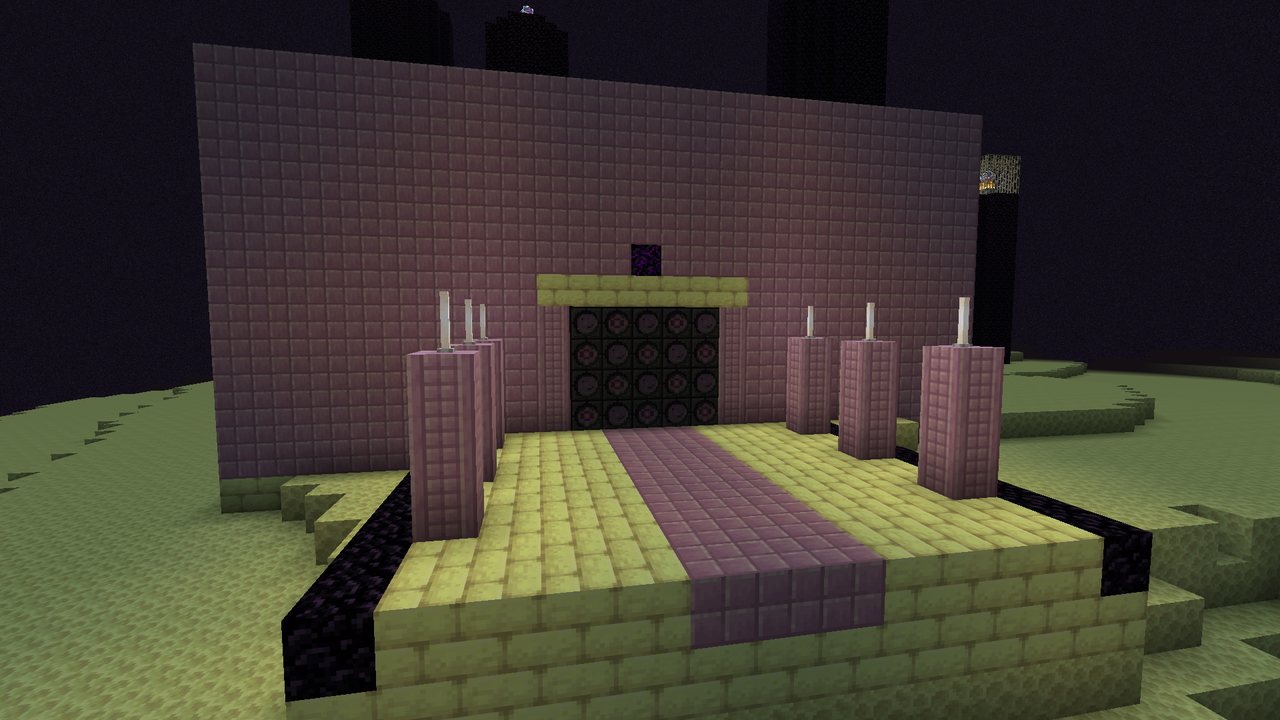 The terrace and the Void and Arcane door.
| Room | What’s in it | Door out |
|---|---|---|
| The terrace | A purpur path between pillars with end rods | Void and Arcane seals |
| Gallery of Orreries | Hanging amethyst “worlds”, star charts, a chest, and four Runebound | Time and Wind seals |
| Windowed corridor | Windows looking out on the void | open |
| The Dome | A star map floor, a telescope, and the star-altar | Side door of Void and Life |
| The Vault | Two chests |
How to open the doors is on the Archive page. For the Time seal, Countdown is the cheapest Time effect (Tier I).
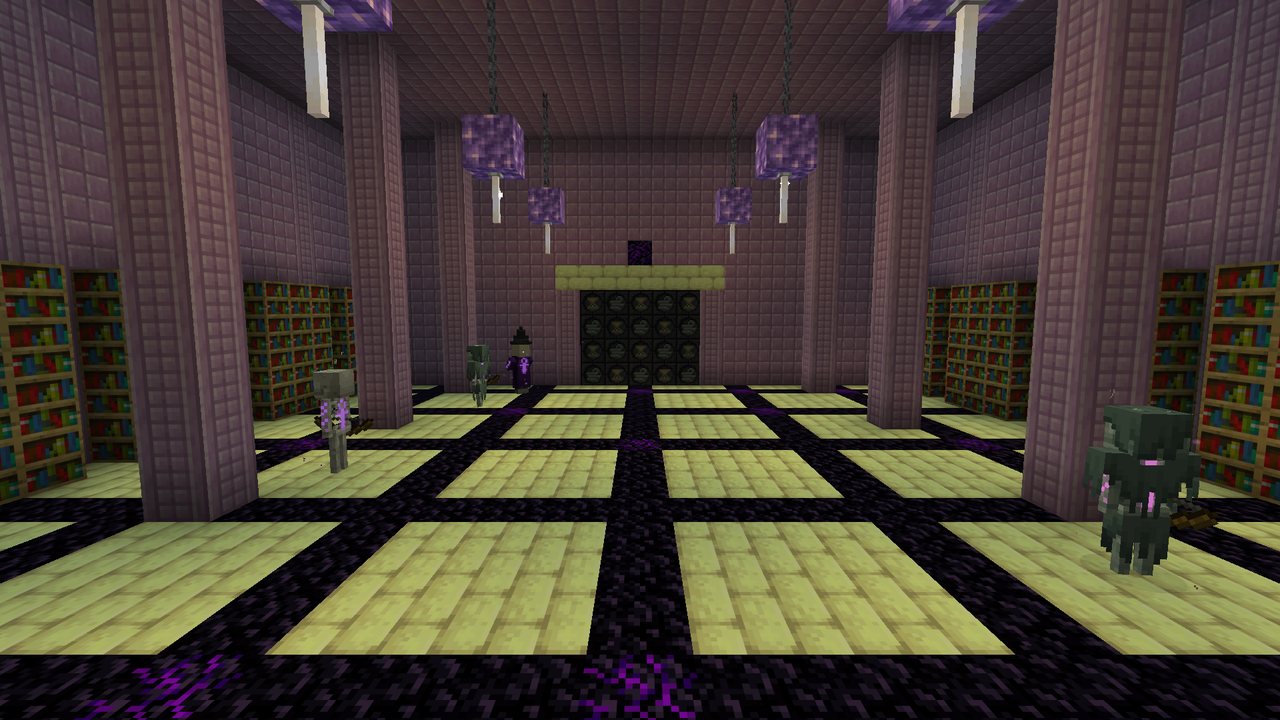 The Gallery of Orreries and its watchers.
The gallery’s guards: a stray (Arcane Spark), a skeleton (Blind Bolt), a stray Adept (Drawing Orb) and a witch (Hex Bolt). The Drawing Orb drags you toward it, so move across its path, not along it.
The gallery chest holds 2 to 3 Tier II or III void and arcane runes, plus 2 to 3 of: a Torn Page, Blank Runes, lapis, ender pearls, a Mana Crystal, chorus fruit, amethyst shards, or (rarely) a shulker shell.
The Star-Eater
It opens its eye the first time a player comes within 14 blocks of the star-altar, and rises with its shield already up. It floats in a slow circle over the altar and never strays more than 20 blocks from it.
| Health | 320 (phases change at about 213 and 107) |
| Armour | 6, and it can’t be knocked back |
| Immune to | Burning, falls and other monsters |
| Weak to | Life (+50%). Resists void (half). See Creature Affinities |
Its trick: the shard shield
Its shield works like your own Shield spell (see Shields and Parrying). Its strength is 20 mana in phase 1, 28 in phase 2 and 36 in phase 3.
- A spell that costs more than the shield breaks it and hits in full.
- A spell that costs that much or less is turned back. A moment later it casts the harmful part of your spell back at you.
- What counts is the spell’s full cost before any discounts. If the Cord screen shows more than the shield’s number, the spell breaks it.
- Arrows and blades glance off while the shield is up, except while it lies on the floor after a plunge.
Its own shards break it too. Knock back a shard from one of its volleys and it flies home, taking 16 off the shield. Knock back the spear it throws and the shield breaks outright. Three ways to knock a shard back:
- Swing at it as it arrives, within about 3 blocks and in front of you.
- Shoot it with a bolt of your own that passes right by it.
- Let your Shield take it. The shard turns back, and your Shield isn’t used up.
If the shield is already down, a returned shard strikes the Star-Eater instead.
Broken, the shield shatters and the Star-Eater sags, open, for 9 seconds (phase 1), 8 (phase 2) or 6.5 (phase 3). While open it takes 25% more damage from everything, including arrows and blades, and can’t cast. It also sheds shards about the floor: 5 in phase 1, 6 in phase 2, 7 in phase 3. Step on one to tread it to dust. Any left lying there fly home when the shield grows back, and while it’s open it can call them home early (see Gathering, below).
How it fights
The Star-Eater never makes the same move twice running. It picks each move from a deck that weighs where you stand: whether you’re close or far, up on a pillar or out of its sight. The boss bar names every move and its counter, and each one has its own pose, sounds and marks on the floor.
| Move | From | What it does | Counter |
|---|---|---|---|
| Volley | Phase 1 | Fans out homing shards, one every quarter second: 3 in phase 1, 4 in phase 2, 5 in phase 3 | Knock them back into it. Each one takes 16 off its shield |
| Lance | Phase 1 | A thread of light runs from it to you, then it throws a spear of shards along it. The aim locks a quarter second before the throw | Step off the line. Or knock the spear back to break its shield outright. It lurches after throwing. In phase 3 a second spear follows |
| Plunge | Phase 1 | Rises 9 blocks while a ring 6 blocks wide follows you across the floor, then drops onto it | Leave the ring. It lies on the floor for 2 seconds (1.5 in phase 3), and blades reach it through its shield. From phase 2 the landing sends out a ring wave to jump; in phase 3 it bounces once |
| Nova | Phase 1 | Sends rings out across the floor, each with a chime: a low ring at your feet or a high one at your head | Jump the low ring, crouch under the high one. 1 ring in phase 1, 2 in phase 2, 3 faster rings in phase 3 |
| Gaze | Phase 2 | Its eye opens and a beam stares after you for 2 seconds, searing and setting you alight | Outrun its turn, or put a pillar between you |
| Cage | Phase 2 | A ring opens under you and 6 shards (8 in phase 3) close in on it, shutting in under a second | Slip out before it shuts |
| Starfall | Phase 3 | Marks open under up to four players and four more about the room, and stars come down on them | Keep off the marks. It likes this move when you’re up on a pillar or hiding |
| Horizon | Phase 3 | Swallows the light. For nearly 2 seconds everything within 12 blocks is dragged toward a grinding ring, then the floor within 4 blocks of the middle caves in | Walk out against the pull and get clear before it caves in |
| Gathering | Shield broken | Threads of light run to the shards it shed, and they fly home in straight lines. Every one that gets home brings its shield back sooner | Keep out of their lines, tread the shards to dust first, or knock them back |
| Lash | Shield broken | Its tendrils whip round it, reaching 3.5 blocks | Back out of reach. Afterwards it hangs limp and takes 50% more on top of being open. In phase 3 a second whip comes round the other way |
Its spells. It casts now and then between its moves, but never while its shield is broken. Each spell is named on the boss bar and lands 1.4 seconds after its circle opens.
| Phase | Its spells |
|---|---|
| 1 | Volleying Arcane Spark, Drawing Orb, Blind Bolt |
| 2 | Blackflame Comet, Wide Arcane Rain, Banish Beam, Hex Bolt › Arcane Lance |
| 3 | Starfall Zone, Greater Arcane Lance, Drawing Bolt › Arcane Comet, Hex-Arcane Domain |
What each phase changes.
- Phase 2 adds the Gaze and the Cage, two rings to each Nova and a ring wave to each landing, and it rests less between moves.
- Phase 3 adds Starfall and Horizon. Half the time it makes its moves in pairs, with shorter tells. It throws two spears and lashes twice, bounces on its plunge, lies on the floor for less time and waits less between its big moves.
The eclipse. At each phase change it can’t be hurt for 3 seconds. It rises with its eye blazing and draws in everything within 12 blocks, then everyone within 6 blocks is hurt and flung away as a stronger shield bursts open. Two Runebound answer it (a stray with Arcane Spark and a skeleton with Blind Bolt; Adepts the second time). No single blow skips a phase.
Tips and counterplay
- Read the boss bar. It names every move and how to beat it.
- Bring a heavy spell for each phase: one costing more than 20, then 28, then 36 mana. For example,
Bolt ·
Lightning · Amplify
breaks the shield in all three phases (Lightning is Tier III, so you need an Amethyst Cord or better). Longer spells cost more. - Or use its own shards. Knock back its spear and the shield breaks outright. Each shard of a volley you knock back takes 16 off it.
- Punish the plunge. Once you’re out of the ring, run in while it lies on the floor. Blades reach it through its shield.
- Tread on its shards while it’s open, before it can call them home.
- Back off when it lashes, then hit it hardest while it hangs limp, with life magic if you can (Vinelash, Moonpetal, Rootsnare).
- Keep a Shield up during volleys. Shards bounce off it for free.
- Don’t feed it small spells. Every one comes back at you.
- Leave fire at home. It’s immune to burning.
- Be more than 6 blocks away when the eclipse ends.
- Kill its keepers. Blind Bolt leaves you in darkness, which makes shards hard to see.
When it falls
- Everyone who fought and is within 96 blocks of the altar gets a Tier IV rune they don’t know yet, straight into their pack.
- Its killer also gets the Astral Lens trophy, the Starmaw rune, 3 Mana Crystals, a Torn Page, a void or arcane rune, and a 50% chance of a rune of the Observatory.
- 220 experience drops on the altar. Anything that doesn’t fit is left there, safe.
- Everyone within 64 blocks earns the Starbreaker feat (1,500 mana toward your next Heart Circle) and advancement. It counts as a boss for the 7th Heart Circle, and the feat itself is one of the things the 14th Heart Circle asks for.
The Astral Lens is kept, not spent: hold it up for 3 minutes of Night Vision and 1 minute of Slow Falling, then it rests for 5 minutes.
The vault
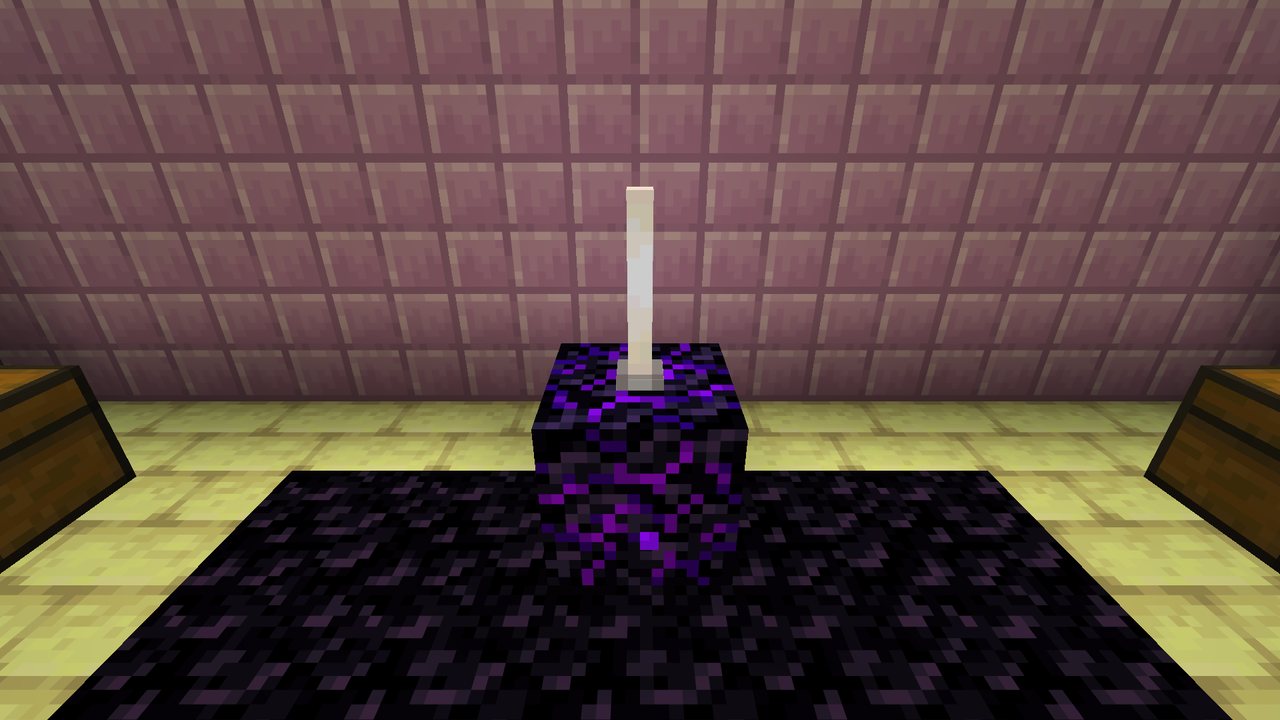 The vault, behind the Void and Life door.
Each of its two chests holds a Tier IV rune, a rune of the Observatory (35% chance of a second), and 2 to 4 of: Mana Crystals, a Torn Page, ender pearls, gold, chorus fruit, amethyst shards, diamonds, an echo shard, or a shulker shell.
The runes of the Observatory:
- Constellation (Tier III shape): links up to 5 enemies you can see near you with lines of light and strikes them all at once.
- Eclipse (Tier III void): a dark disc blinds and hurts enemies beneath it, and your spells hit them harder.
Full details are on Runes of the World.